Tesla Model S: Gas Strut - Hood - LH (Remove and Replace)
Tesla Model S (2012-2026) Service Manual / Closures / Gas Strut - Hood - LH (Remove and Replace)
Removal
- Open hood.
- Support hood in open position.
- Release clip securing gas strut to body.
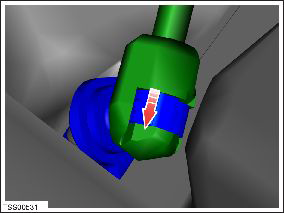
- Disconnect gas strut from ball joint.
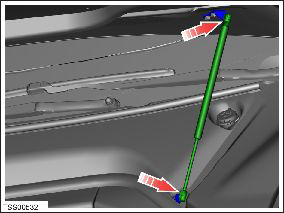
- Release clip securing gas strut to hood.
- Disconnect gas strut and remove from hood.
- Installation procedure is the reverse of removal, except for the following. Note: Clean the affected areas before installation. Note: Apply the recommended grease to bearing/bushing surfaces.
- Lubricate both pivot points.
READ NEXT:
 Striker - Hood (Remove and Replace)
Removal
Open the hood for access.
If the vehicle is rear wheel drive (RWD), remove the clips (x6)
that secure the acoustic panel to the hood and carefully peel back
the acoustic p
Latch - Hood - Primary (RWD) (Remove and Replace)
Removal
Remove the hood latch cover (refer to procedure).
Remove the nuts (x2) that secure the latch assembly to the
crossmember (torque 16 Nm).
Release the latch assembly from th
Latch - Hood - Secondary (RWD) (Remove and Replace)
Removal
Remove the front underhood apron (refer to procedure).
Remove the bolts (x2) that secure the secondary latch to the
crossmember (torque 10 Nm).
Cauti
SEE MORE:
Replacing Wiper Blades
For optimum performance, replace the wiper blades at
least once a year. Replacement blades must meet the
following criteria:
The blade on the driver's side must be 26 inches (650
mm) long and 20 inches (500 mm) long for the blade
on the passenger's side.
Ensure the connector on the replacem
Four Wheel Alignment Check - Preparation
Note: This procedure
is not specific to a particular alignment machine. Follow the
alignment equipment manufacturer's instructions for additional
information and safety instructions.
Preparation
Ensure that the following are within
Tesla-approved specifications befor
© 2019-2026 Copyright www.tesms.org
