Tesla Model S: Handle - Exterior Release - Door - Rear - LH (Remove and Replace)
Tesla Model S (2012-2026) Service Manual / Closures / Handle - Exterior Release - Door - Rear - LH (Remove and Replace)
Removal
- Remove regulator assembly (refer to procedure)
- Make sure exterior release handle is fully retracted.
- Disconnect handle harness connector.
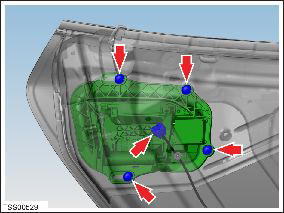
- Remove nuts (x4) securing door release assembly to reinforcement (torque 9 Nm).
- Carefully release door handle assembly from door outer panel and
disconnect handle harness connector.
Caution: Take care not to damage component(s).
Caution: Protect exterior paint surfaces during this procedure.
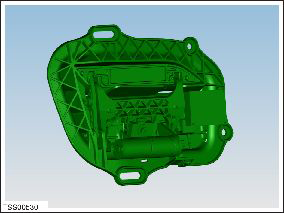
- Remove exterior release handle assembly from door.
- Remove door handle rear seal.
- Remove screws (x4) securing handle grip backplate and remove
(torque 2 Nm).
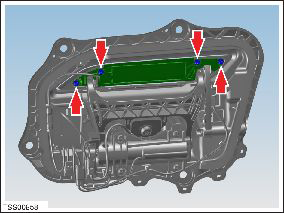
- Release LED from door grip.
- Remove door grip from fork.

Installation is the reverse of removal, except for the following:
- Install the grip and back plate on the new handle assembly before reinstallation.
-
Use Toolbox to update or redeploy the firmware:
- If the vehicle is not running the latest firmware, run the "Vehicle Firmware Update" procedure.
- If the vehicle is running the latest firmware, run the "Firmware Redeploy" procedure.
- After installation, check operation of replacement door handle.
READ NEXT:
 Grip - Door - Exterior Handle - Front - LH (Remove and Replace)
Removal
Remove grip backplate (refer to procedure) .
Release LED from door grip.
Release door grip from fork and remove.
Grip - Door - Exterior Handle - Rear - LH (Remove and Replace)
Removal
Remove grip backplate (refer to procedure)
Release LED from door grip.
Remove door grip from fork.
Ins
Back Plate - Door - Exterior Handle - Front - LH (Remove and Replace)
Removal
Remove door handle for access (refer to procedure)
Position handle assembly on a soft working surface.
Remove door handle rear seal.
Remove screws (x4) securing handle gri
SEE MORE:
Fluids and Capacities
Fluids
Air conditioning
Depending on its intended sales region, the air conditioning system is
filled with R134a or 1234yf refrigerant. Refer to the label on the RH
frunk trim.
If oil needs to be added to the system, use only POE ND-11 or
equivalent.
Caution: Do not mix differe
Sensor - Parking Distance - Rear - Each (Remove and Replace)
Removal
Remove the rear fascia assembly (refer to procedure).
Set the fascia assembly on a flat, clean surface.
Disconnect the parking distance sensor connector.
Carefully release the parking dis
© 2019-2026 Copyright www.tesms.org
