Tesla Model S: Handle - Interior Release - Door - Rear - LH (Remove and Replace)
Tesla Model S (2012-2026) Service Manual / Closures / Handle - Interior Release - Door - Rear - LH (Remove and Replace)
Removal
- Remove the rear door trim panel (refer to procedure).
- Remove the screws (x3) and the nut (x1) that secure the interior
door handle to the trim pad (torque 3 Nm).
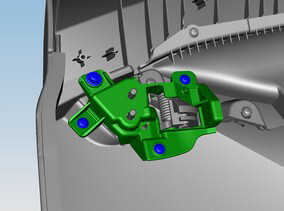
- Release and remove the door handle.
Installation procedure is the reverse of removal.
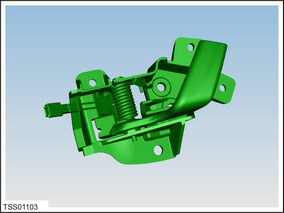
Cable - Interior Release - Front - LH (Remove and Replace)
RemovalRemove LH front door latch assembly (refer to procedure)
Installation
Installation procedure is the reverse of removal.
READ NEXT:
 Handle - Exterior Release - Door - Front - LH (Remove and Replace)
Removal
Remove regulator assembly (refer to procedure)
Make sure exterior release handle is fully retracted.
Disconnect handle harness connector.
Remove nuts (x4) securing door re
Handle - Exterior Release - Door - Rear - LH (Remove and Replace)
Removal
Remove regulator assembly (refer to procedure)
Make sure exterior release handle is fully retracted.
Disconnect handle harness connector.
Remove nuts (x4) securing door re
Grip - Door - Exterior Handle - Front - LH (Remove and Replace)
Removal
Remove grip backplate (refer to procedure) .
Release LED from door grip.
Release door grip from fork and remove.
SEE MORE:
Link - Sway Bar - Front - LH (Remove and Replace)
Warning: If the vehicle has air suspension,
activate "Jack" mode on the touchscreen before raising and
supporting the vehicle.
Removal
Loosen the front LH lug nuts (torque 175 Nm).
Raise and support the vehicle (refer to procedure)
Remove road wheel (refer to procedure)
Seat Belt Assembly - 2nd Row - Center (Remove and Replace)
Removal
Remove the 2nd row seat cushion (refer to procedure)
Carefully release pegs (x2) securing seatbelt trim to seat back.
Release clips (x18) securing seat back cover. Remove for access
to middle seat belt.
© 2019-2026 Copyright www.tesms.org
