Tesla Model S: Horn - 1st Generation (Remove and Replace)
Tesla Model S (2012-2026) Service Manual / Electrical / Horn - 1st Generation (Remove and Replace)
Removal
- Remove the front underhood apron (refer to procedure).
- Remove the bolt that secures the horn to the bracket (torque 8
Nm).
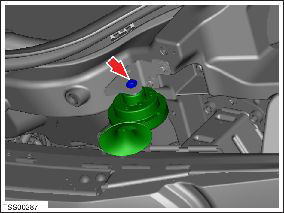
- Move the connector covers aside and disconnect the horn connectors (x2).
- Remove the horn from the vehicle.
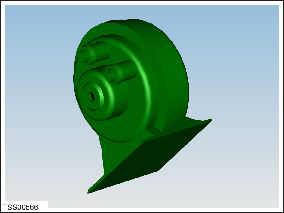
Installation procedure is the reverse of removal.
READ NEXT:
 Horn - 2nd Generation (Remove and Replace)
Removal
Remove the active center louver assembly (refer to procedure).
Place the active center louver assembly on a soft, clean surface
with the front of the duct assembly facing
Wiper Motor Assembly (Remove and Replace)
Removal
Ensure that the wipers are in the off position by rotating the
end of the left-hand steering column lever toward you.
Open the hood to the service position.
Remove the cow
Pump - Windshield Washer Reservoir (Remove and Replace)
Removal
Remove the front LH upper wheel arch liner (refer to procedure).
Position a container to collect any spillage.
Disconnect the washer pump connector.
Release the washer
SEE MORE:
Trim - Cushion
Trim - Cushion - Driver's Seat (Remove and Replace)
Removal
Note: This component cannot be serviced individually. To
service this component, perform the following:
Replace the driver's seat trim and foam assembly (refer to
procedure).
In
Brake Sensor Cluster - ESC (Remove and Replace)
Removal
Remove center console assembly
(refer to procedure)
Disconnect wiring harness connector.
Carefully cut acoustic padding covering ESC
sensor.
Peel back acoustic padding to expose ESC
module.
© 2019-2026 Copyright www.tesms.org
