Tesla Model S: Knee Air Bag - Front Passenger's (Remove and Replace)
Warning: If the 12V power supply is disconnected, do not attempt to open any doors with door glass in closed position. Failure to follow this instruction could result in door glass shatter.
Note: Before disconnecting the 12V power supply, ensure that the driver's door window is fully open. Failure to follow this instruction could result in vehicle lockout.
Removal
- Open both front doors.
- Remove the RH footwell cover (refer to procedure).
- Disconnect 12V power.
- Rear wheel drive (RWD): Refer to procedure.
- Dual Motor: Refer to procedure.
- Remove the nuts (x2) that secure the passenger's knee airbag to
the cross beam (torque 10 Nm).
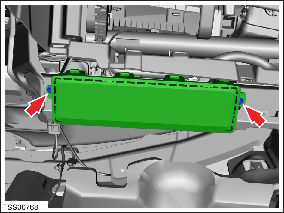
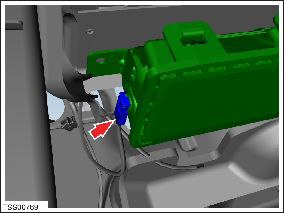
- Carefully lower the airbag and disconnect the airbag harness
connection.
Warning: To avoid personal injury, eye protection must be worn when performing this operation.
Warning: Store the air bag module with the deployment side facing up. This will prevent it from being propelled if accidentally deployed, which might cause injury.
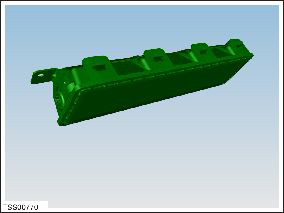
- Remove the airbag from the vehicle.
Installation procedure is the reverse of removal.
READ NEXT:
 Curtain Air bag - Driver's (Remove and Replace)
Warning: If the 12V power supply is disconnected, do
not attempt to open any doors with door glass in closed
position. Failure to follow this instruction could result in
door glass shat
Seat Belt Assembly - 1st Row - LH (Remove and Replace)
Warning: If the 12V power supply is disconnected, do
not attempt to open any doors with door glass in closed
position. Failure to follow this instruction could result in
door glass shat
Buckle Assembly - 1st Row - LH (Remove and Replace)
Removal
Open door.
Power seat adjust rearwards and upwards for access.
Remove screw securing inner cover to seat.
C
SEE MORE:
Vehicle Certification Label
The Vehicle Certification label provides:
GVWR - Gross Vehicle Weight Rating. The maximum
allowable total mass of Model S. This is calculated as
the weight of Model S equipped with the heaviest
factory selectable options, all passengers, fluids, and
cargo.
GAWR FRT and GAWR RR - Gross Axl
Charging Equipment
Charging equipment designed specifically to charge
your Model S is available from Tesla. A Tesla Wall
Connector, which installs in your parking space, is the
fastest way to charge Model S for daily use.
Model S can also be charged using a Mobile Connector
and the appropriate adapter(s) that all
