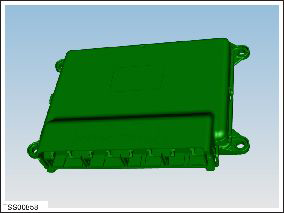
Tesla Model S: Module - Thermal Controller (Remove and Replace)
Tesla Model S (2012-2026) Service Manual / Electrical / Module - Thermal Controller (Remove and Replace)
Removal
- Remove IP carrier (refer to procedure)
- Remove screws (x4) securing thermal control module to HVAC unit.
- Position module for access and disconnect wiring harness
connectors (x4).
Caution: Take care not to damage component(s).
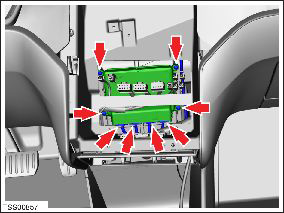
- Position harness connectors aside, roll module and remove from
dash assembly.
Installation procedure is the reverse of removal, except for the following: Use Toolbox to update or redeploy the firmware:
- If the vehicle is not running the latest firmware, run the "Vehicle Firmware Update" procedure.
- If the vehicle is running the latest firmware, run the "Firmware Redeploy" procedure.
READ NEXT:
 Module - HVAC Controller - RCCM (Remove and Replace)
Removal
Remove the IP carrier (refer to procedure).
Disconnect the HVAC harness connector from the Remote Climate
Control Module (RCCM).
Remove the screws (x4) that secure the RCC
Module - Seat Heater - Driver's Seat (Remove and Replace)
Removal
Open door.
Power seat height adjust fully upwards for access.
Disconnect seat heater module connectors and harnesses (x2).
Module - TPMS - Baolong (Remove and Replace)
Warning: If the vehicle has air suspension, activate "Jack"
mode on the touchscreen before raising and supporting the vehicle.
Removal
Raise and support the vehicle (refer to pro
SEE MORE:
Brake Caliper - Rear - LH (Remove and Replace)
Warning: If the vehicle
has air suspension, activate "Jack" mode on the touchscreen before
raising and supporting the vehicle.
Removal
Remove the rear underhood apron
(refer to procedure).
Remove the brake fluid reservoir cap and place
an absorbent materi
Drive Unit - Rear - Large (Remove and Install)
Special tools required for this procedure:
Supplier
Part Number
Description
Tesla
1000991
Axle Extractor
Note: Use 1000991 for a large drive unit only.
© 2019-2026 Copyright www.tesms.org
