Tesla Model S: Pressure Transducer - Low Pressure (Remove and Replace)
Tesla Model S (2012-2026) Service Manual / Thermal Management / Pressure Transducer - Low Pressure (Remove and Replace)
Removal
- Recover refrigerant from the vehicle (refer to procedure).
- Remove the underhood storage unit (refer to procedure).
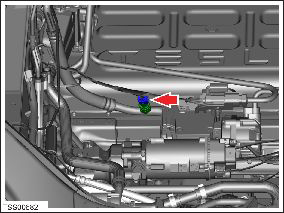
- Disconnect the electrical connector from the pressure transducer.
- Use a wrench to remove the pressure transducer from
the A/C pipe (torque 8 Nm).
Caution: To prevent damage always use a suitable wrench to hold the backing nut when loosening pipes and unions.
Caution: Plug pipe connections to prevent ingress of moisture or dirt.

- Remove the pressure transducer from the vehicle.
Installation procedure is the reverse of removal, except for the following: Recharge the refrigerant.
READ NEXT:
 Battery Chiller and TXV Assembly (Remove and Replace)
Warning: If the 12V power supply is disconnected, do
not attempt to open any doors with door glass in closed position.
Failure to follow this instruction could result in door glass
shat
 Cooling System - Partial Refill and Bleed
Refill
Caution: Use the specified coolant only. In this manual, refer
to General Information > Capacities, Fluids, and Lubricants >
Fluids.
Remove the coolant reservoir cap (r
 Cooling System - Drain and Refill
Note: Make sure at least 14 L of the specified coolant is
available before beginning this procedure.
Caution: Use the specified coolant only. In this manual, refer
to General Informati
SEE MORE:
 Bushing Installation, Front Motor Mount
Use brake cleaner to clean the threaded rod and the nut bearing
assemblies.
Use 3M Spray Lube 08878 or equivalent to lubricate the threaded
rod and the nut bearing assemblies.
Slide the bushing into the left side of the front motor mount so
that the shorter cavities are horiz
 Sensor - Impact - Front (Remove and Replace)
Warning: To avoid personal injury, observe all relevant
safety precautions before removing or testing any SRS components.
Removal
Remove the underhood storage unit:
Rear wheel drive (RWD): Refer to procedure.
Dual Motor: Refer to procedure.
Di
© 2019-2026 Copyright www.tesms.org

