Tesla Model S: Rear Lettering (Remove and Replace)
Tesla Model S (2012-2026) Service Manual / Exterior fittings / Rear Lettering (Remove and Replace)
Special tool(s) required for this procedure:
| Supplier | Part Number | Template color | Description | Applies to |
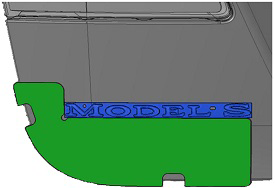
| Tesla | 1024723-00-A | Black | MODEL S BADGE LOCATION FIXTURE | All Model S |
| Tesla | 1024725-00-A | Black | MODEL S BATTERY BADGE LOCATION FIXTURE (UPPER DESIGN) | P85+ |
| Tesla | 1065134-00-A | Light gray | MODEL S, BATTERY BADGE FIXTURE, SINGLE MOTOR | 60, 70, 85, P85 |
| Tesla | 1065135-00-A | Red | MODEL S, BATTERY BADGE FIXTURE, DUAL MOTOR | 70D, 85D, P85D, 90D, P90D |
| Tesla | 1067207-00-D | Blue | MODEL S, BATTERY BADGE FIXTURE, LUDICROUS | P85D, P90D |
Note: If retrofitting a Ludicrous Speed badge on a vehicle that already has a Performance battery badge installed., refer to procedure 12051006 (refer to procedure).
- If the fixture tools are not available, use masking tape to mark
the position of the badge.
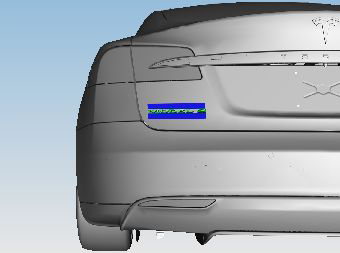
- Using a suitable tool, carefully remove the lettering. Caution: Care must be taken to avoid damage to paintwork and exterior trim.
- Clean the affected area(s) with alcohol wipes.
- On the touchscreen, touch the Tesla logo to verify the battery size and Performance level.
- Open the liftgate to a convenient working height.
- Clean the affected area(s) of the liftgate with alcohol wipes. Note: Allow the alcohol to completely dry before continuing to the next step of this procedure.
- Place the template into position on the corner of the liftgate.
Set the badge against the corner of the template.
Tip: Use tape or a non-marring plastic clamp to hold
the template in place.
Caution: Care must be taken to avoid damage to paintwork and exterior trim.
Model X template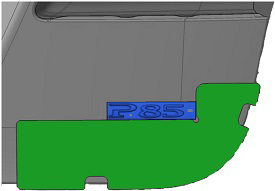
Battery template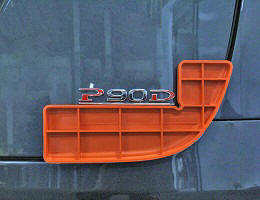
Ludicrous Speed template - Peel the backing strip off from the lettering.
- Press firmly on the badge to completely seal the badge to the liftgate.
- Remove the template
- Peel off the plastic front badge carrier from the badge.
Note: If the fixture tools are available, refer to "Installation Using Fixture Tools".
- On the touchscreen, touch the Tesla logo to verify the battery size and Performance level.
- Open the liftgate to a convenient working height.
- Clean the affected area(s) of the liftgate with alcohol wipes. Note: Allow the alcohol to completely dry before continuing to the next step of this procedure.
- Peel the backing strip off from the lettering.
- Position the lettering using the masking tape as a guide and
press firmly to ensure that the lettering is fully seated.
- Peel off the plastic front badge carrier from the badge.
- Remove the masking tape from the vehicle.
READ NEXT:
 Applique - Liftgate (Remove and Replace)
Special tool required for this procedure:
Supplier
Part Number
Description
Tesla
1049517-0
Badge - Ludicrous Speed (Retrofit)
Special tool required for this procedure:
Supplier
Part Number
Description
Bracket - License Plate - Front (Retrofit)
Special tool required for this procedure:
Supplier
Part Number
Description
SEE MORE:
Front Reading (Dome) Lights (Remove and Replace)
Removal and Install
Use a trim stick to remove the front dome light bezels. Discard
the bezels.
Release the screw cover from each sun visor center retaining
block and remove the screw.
Fascia Assembly - Front (Remove and Replace)
Removal
Remove the front fascia (refer to procedure).
Remove the front fascia applique:
If the vehicle has the 1st generation front fascia applique,
refer to procedure.
If the vehicle has the 2nd generation front fascia applique,
refer to procedure.
© 2019-2026 Copyright www.tesms.org
