Tesla Model S: Rear View Mirror - 2nd Generation (Remove and Replace)
Tesla Model S (2012-2026) Service Manual / Interior trim / Rear View Mirror - 2nd Generation (Remove and Replace)
Note: This procedure describes how to remove and replace the 2nd generation rear view mirror. If the vehicle is equipped with a 1st generation rear view mirror, refer to procedure 15050202 (refer to procedure).
Removal
- Remove the front cover by pulling straight down to release the
clips.
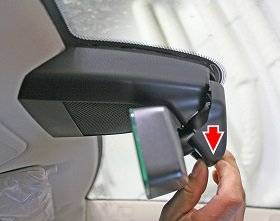
- Disconnect the rear view electrical connector.
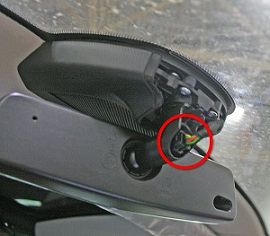
- Release the rearview mirror by turning it clockwise until it
pulls free.
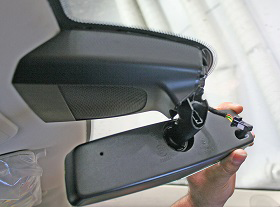
- Remove the mirror.
Installation procedure is the reverse of removal.
READ NEXT:
 Sun Visor - Driver's (Remove and Replace)
Removal
Use a trim stick or other non-marring pry tool to release the
visor mounting cover.
Caution: Take care not to damage component(s).
Assembly - Mirror - Sun Visor - LH (Remove and Replace)
Removal
Fold down the sun visor.
Starting at the top of the mirror assembly, use a trim tool to
pry the mirror assembly from the sun visor.
Trim - Rear View Mirror (Remove and Replace)
Removal
Position vehicle for access to front doors.
Cover dash assembly to avoid damage.
Caution: Make sure the touch screen is fully
protected.
SEE MORE:
HV Junction Box - 2nd Generation (Remove and Replace)
Warning: Only technicians who have been trained in High
Voltage Awareness are permitted to perform this procedure. Proper
personal protective equipment (PPE) and insulating HV gloves with a
minimum rating of class 00 (500V) must be worn any time a high
voltage cable is handled. Refer
Sensor - Ride Height - Front - LH (Remove and Replace)
Warning: If the vehicle has air suspension, activate "Jack"
mode on the touchscreen before raising and supporting the vehicle.
Removal
Position the vehicle on a lift, but do not raise the vehicle at
this time.
Loosen the front LH lug nuts (torque 175 Nm).
Remove the
© 2019-2026 Copyright www.tesms.org
