Tesla Model S: Sun Visor - Driver's (Remove and Replace)
Tesla Model S (2012-2026) Service Manual / Interior trim / Sun Visor - Driver's (Remove and Replace)
Removal
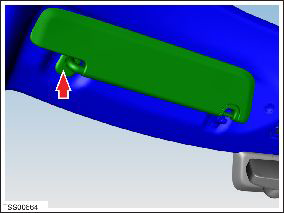
- Use a trim stick or other non-marring pry tool to release the
visor mounting cover.
Caution: Take care not to damage component(s).
- Remove the screw that secures the sun visor to the roof.
- Remove the sun visor.
Installation procedure is the reverse of removal.
READ NEXT:
 Assembly - Mirror - Sun Visor - LH (Remove and Replace)
Removal
Fold down the sun visor.
Starting at the top of the mirror assembly, use a trim tool to
pry the mirror assembly from the sun visor.
Trim - Rear View Mirror (Remove and Replace)
Removal
Position vehicle for access to front doors.
Cover dash assembly to avoid damage.
Caution: Make sure the touch screen is fully
protected.
Finisher - Liftgate - Rear Window - Upper (Remove and Replace)
Removal
Position the vehicle for access to the tailgate.
Open the tailgate to working height.
Carefully release the clips (x4) that secure the upper trim to
the tailgate.
SEE MORE:
Pyrotechnic Fuse (Remove and Replace)
Warning: Prior to disconnection of 12 volt power supply,
ensure driver's door glass is in the fully open position. Failure to
follow this instruction could result in vehicle lockout.
Warning: If 12 volt power supply is disconnected, do not
attempt to open any doors with door glass in
Charging slowed - Some AC phases not powered
Check power source and charging equipment
Charging speed has been reduced due to a condition that affects your
vehicle's ability to charge with AC power. DC
fast charging / Supercharging should still function as expected.
Your vehicle's onboard charger has detected that one or more power converte
© 2019-2026 Copyright www.tesms.org
