Tesla Model S: Seal - Body - Side - Front - Primary - LH (Remove and Replace)
Tesla Model S (2012-2026) Service Manual / Closures / Seal - Body - Side - Front - Primary - LH (Remove and Replace)
Removal
- Remove the 'B' post upper trim (refer to procedure).
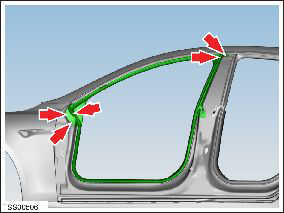
- Release the clips (x3) that secure the leading edge of the seal to the body. Caution: Take care not to damage component(s). Caution: Protect exterior paint surfaces during this procedure. Note: Components have been removed in this graphic to aid clarity.
- Release the clips (x2) that secure the upper trailing edge of the seal to the body.
- Carefully release the seal from the rocker panel and work towards the upper section of the seal.
- Release the remaining seal from the brightwork.
- Remove the seal.
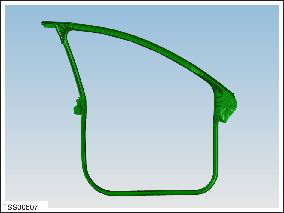
Locate the seal end stop into the brightwork, and then install the clips to align the seal.
READ NEXT:
 Seal - Body - Side - Rear - Primary - LH (Remove and Replace)
Removal
Remove 'B' post upper trim (refer to procedure)
Release clip (x1) securing rear door seal to body.
Carefully release seal from rocker panel and work toward upper
section o
Seal - Door - Front - A Pillar - Margin - LH (Remove and Replace)
Removal
Open vehicle door, ensuring good access.
Carefully release clip (x1) securing top of flap seal to door.
Caution: Take care not to damage component(s).
Seal - Door- Front - Rocker - LH (Remove and Replace)
Warning: If the vehicle has air suspension, activate "Jack"
mode on the touchscreen before raising and supporting the vehicle.
Removal
Raise and support the vehicle (refer to procedu
SEE MORE:
Headlight - Adjust - Europe
Europe (ECE)
Position the vehicle for adjusting the headlights:
The vehicle is in a darkened area.
The vehicle is on a level surface.
The vehicle is perpendicular to a wall that has a white
matte surface. The wall must be at least 1.8m (6 ft) high
Remove Components For Access
Note: If possible, use the
"From Below" procedure to remove and install the front drive unit
(refer to procedure).
Special tools required for this procedure:
Supplier
Part Number
Descripti
© 2019-2026 Copyright www.tesms.org
