Tesla Model S: Seal - Door - Front - A Pillar - Margin - LH (Remove and Replace)
Tesla Model S (2012-2026) Service Manual / Closures / Seal - Door - Front - A Pillar - Margin - LH (Remove and Replace)
Removal
- Open vehicle door, ensuring good access.
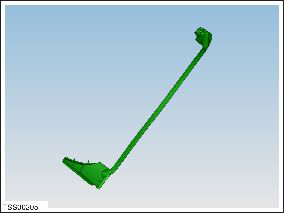
- Carefully release clip (x1) securing top of flap seal to door. Caution: Take care not to damage component(s). Note: Components have been removed in this graphic to aid clarity. Caution: Protect exterior paint surfaces during this procedure.
- Carefully release clips (x2) securing lower end of flap seal to door.
- Release remaining seal to front edge of door.

- Remove door seal.
Installation procedure is the reverse of removal.
Note: Clean the affected areas before installation.
READ NEXT:
 Seal - Door- Front - Rocker - LH (Remove and Replace)
Warning: If the vehicle has air suspension, activate "Jack"
mode on the touchscreen before raising and supporting the vehicle.
Removal
Raise and support the vehicle (refer to procedu
Seal - Door - Front - LH (Remove and Replace)
Removal
Remove door trim (refer to procedure)
Release clips (x4) securing flap seal ends front and rear.
Note: Components have been removed in this graphic
Seal - Door - Rear - C Pillar - Margin - LH (Remove and Replace)
Removal
Remove door trim (refer to procedure)
Release clips (x3) securing flap seal end to door.
Note: Components have been removed in this
graphic to aid
SEE MORE:
Air pressure in tires very low
PULL OVER SAFELY - Check for flat tire
This alert indicates that one or more of the tires on your vehicle is
extremely low or flat.
The tire pressure monitoring system (TPMS) has detected that the air pressure in
one or more of your tires is
significantly lower than the recommended cold tire pre
Indicator Lights
Indicator lights display along the top of the instrument
panel to show status and alert you of specific vehicle
conditions.
A brake system fault is
detected or the
brake fluid level is low. Contact Tesla
immediately.
A brake booster fault has been
detected.
An ABS (Anti-lock Braking
Syste
© 2019-2026 Copyright www.tesms.org
