
Tesla Model S: Seat Belt Assembly - 2nd Row - Center (Remove and Replace)
Tesla Model S (2012-2026) Service Manual / Safety and Restraint / Seat Belt Assembly - 2nd Row - Center (Remove and Replace)
Removal
- Remove the 2nd row seat cushion (refer to procedure)
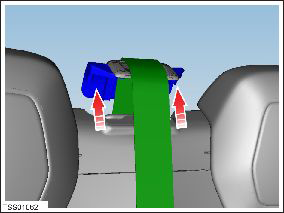
- Carefully release pegs (x2) securing seatbelt trim to seat back.
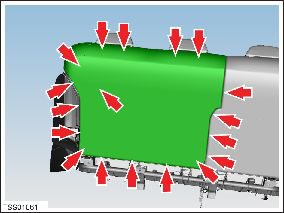
- Release clips (x18) securing seat back cover. Remove for access
to middle seat belt.
- Remove the bolt that secures the seat belt to the 2nd row seat
base frame (torque 40 Nm).
Caution: This bolt is a one time use component. Ensure that a new bolt is used during reinstallation.
.png)
- Release top rail reinforcement from foam for access.
- Remove bolt (torque 40 Nm) securing seatbelt reel to seat frame.
- Remove middle seat belt assembly.
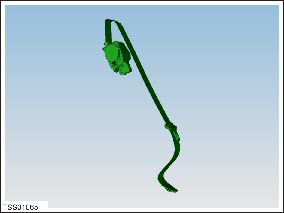
Installation procedure is the reverse of removal, except for the following:
Caution: Replace any broken clips.
READ NEXT:
 Seat Belt Assembly - 3rd Row - LH (Remove and Replace)
Removal
Maneuver the 3rd row seat for access to the anchor points (x4).
Remove the bolts (x4) that secure the seat belt to the body and
seat back (torque 45 Nm).
&
Buckle Assembly - 3rd Row - LH (Remove and Replace)
Warning: Prior to disconnection of 12 volt power supply,
ensure driver's door glass is in the fully open position. Failure to
follow this instruction could result in vehicle lockout.
Warni
Pre-Tensioner - Outboard Lap - 1st Row - LH (Remove and Replace)
Removal
Disconnect 12V power.
Rear wheel drive (RWD): Refer to
procedure.
Dual Motor: Refer to procedure.
Use a trim tool to carefully relea
SEE MORE:
Assembly - Panel - Wrapped - LH (Remove and Replace)
Removal
Release the clips (x10) that secure the wrapped panel trim.
Note: Components have been removed in this graphic
to aid clarity.
Remove the LH wrapped panel trim.
Adjacent Lane Speed
NOTE: Depending on market region, vehicle
configuration, options purchased, and software version,
your vehicle may not be equipped with Adjacent Lane
Speed, or the feature may not operate exactly as
described.
When moving significantly faster than vehicles in
adjacent lanes, Model S automatical
© 2019-2026 Copyright www.tesms.org
