Tesla Model S: Sensor - Light/Rain (Remove and Replace)
Tesla Model S (2012-2026) Service Manual / Body / Sensor - Light/Rain (Remove and Replace)
Removal
- Remove the rear view mirror trim. (refer to procedure)
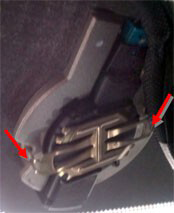
- Press the spring clip while lifting the corners of the clip to
remove the sensor from the bracket.
Installation procedure is the reverse of removal, except for the following:
Note: The light/rain sensor is a one time use component. If the rain/light sensor is removed from the windshield, a new sensor must be installed.
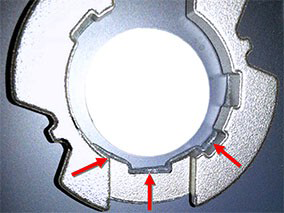
- Inspect the mounting bracket for excess adhesive. If necessary,
use a knife or razor blade to remove any excess adhesive around the
inner edge of the bracket.
- Clean the glass surface before installing the light/rain sensor.
- To test the rain sensor operation, sit in the driver's seat. Set the wipers to the 1st or 2nd intermittent position while an assistant sprays the windshield with water. Check that the wipers sweep when water is sprayed in front of the sensor.
- To test the light sensor operation, have an assistant shine a bright light on the sensor for several seconds. Check that the touchscreen changes from night to day brightness.
READ NEXT:
 Fixed Glass - Front Door - LH (Remove and Replace)
Removal
Remove the front door mirror assembly (refer to procedure).
Carefully release the quarter glass from the seal and frame.
Body Glass - Rear Quarter - LH (Remove and Replace)
Warning: To avoid personal injury, wear cut-resistant
gloves when performing this operation.
Note: Use Dow Betaseal Express or an equivalent fast-curing
glass adhesive to perform this pr
SEE MORE:
Wheel (Remove and Install)
Warning: If the vehicle
has air suspension, activate "Jack" mode on the touchscreen before
raising and supporting the vehicle.
Note: Vehicles with air
suspension might need the suspension to be set to "High" or "Very
High" to allow the vehicle to be positioned and supported corre
Strut - Liftgate (Remove and Replace)
Removal
Open liftgate.
Support liftgate in open position.
Release clip securing gas strut to body.
Disconnect gas strut from ball joint.
Release clip securing gas strut to liftgate.
Disconnect and remove gas
© 2019-2026 Copyright www.tesms.org
