Tesla Model S: Actuator - Cinching (Remove and Replace)
Tesla Model S (2012-2026) Service Manual / Closures / Actuator - Cinching (Remove and Replace)
Removal
- Open liftgate and secure at working height.
- Remove liftgate trim (refer to procedure)
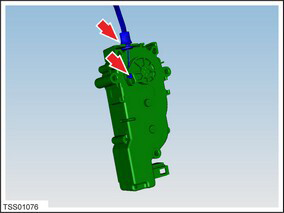
- Remove screws x3 securing cinch motor to liftgate.
- Release harness clip, rotate the cinch clockwise to access harness connector.
- Disconnect harness connector.
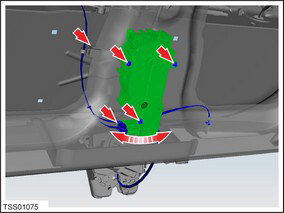
- Position cinching motor for access to latch release cable.
Release cable from abutment and disconnect inner cable from motor.
Installation procedure is the reverse of removal.
READ NEXT:
 Cable - Cinching (Remove and Replace)
Removal
Remove cinch actuator from liftgate (refer to procedure)
Disconnect cinch cable from latch assembly.
Remove cin
Exterior Release Switch - Liftgate (Remove and Replace)
Removal
Open the liftgate to a suitable working height.
Remove the applique from the liftgate (refer to procedure).
Caution: Take care not to damage component(s)
Door Assembly - Front - LH (Remove and Replace)
Removal
Position vehicle with clear access to door assembly.
Remove sill panel trim (refer to procedure)
Disconnect door harness connectors (x3) from dash wiring
harness.
Supp
SEE MORE:
Folding Mirrors at Specific
Locations
In addition to having mirrors fold automatically
whenever you park Model S, you can fold (and unfold)
mirrors anytime your driving speed is less than 31 mph
(50 km/h). This is useful for parking in tight spaces. To
do so, touch Controls > Fold Mirrors.
When you fold mirrors, a Location Saved
Mount - Front Drive Unit - LH (Remove and Replace) - Installation
Installation
Loosen the bolts that secure the 2 sections of the LH motor
mount.
Set the new motor mount into position.
Secure the 3 bolts that secure the motor to the LH motor mount
(torque 38 Nm).
Secure the
© 2019-2026 Copyright www.tesms.org
