Tesla Model S: Subframe Assembly - Rear (Remove and Replace)
Tesla Model S (2012-2026) Service Manual / Chassis / Subframe Assembly - Rear (Remove and Replace)
Removal
-
Remove the rear drive unit:
- Small drive unit: Refer to procedure.
- Large drive unit: Refer to procedure.
- Remove the rear sway bar (refer to procedure).
-
If the vehicle is equipped with air suspension,
remove the bolt that secures the LH ride height sensor bracket to
the subframe (torque 7 Nm). Remove the sensor and bracket.
- Repeat the previous step to remove the RH ride height sensor and bracket.
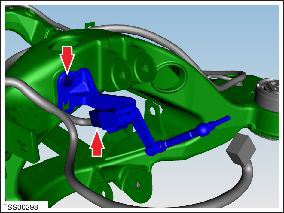
- Release the harness clips (x11) from the subframe assembly.
-
Remove the rear subframe harness.
Installation procedure is the reverse of removal.
READ NEXT:
 Subframe Assembly - Front (Remove and Install)
Special tools required for this procedure:
Supplier
Part Number
Description
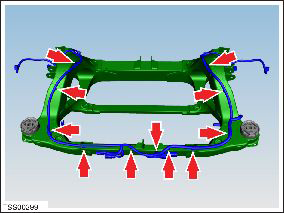
Subframe Assembly - Front (Remove and Replace)
Removal
Remove front subframe assembly for access
(refer to procedure)
Remove and discard the bolts (x2) securing
steering rack assembly to subframe (torque 175 Nm).
Skidplate - Front (Remove and Replace)
Warning: If the vehicle
has air suspension, activate "Jack" mode on the touchscreen before
raising and supporting the vehicle.
Removal
Remove front aero shield
(refer
SEE MORE:
Brightwork - Body side - LH (Remove and Replace)
Removal
Release the top of the front and rear door seals.
Note: Components have been removed in this graphic
to aid clarity.
Note: The following image shows the rear door
seal.
Rem
Parking Brake
To engage the parking brake, touch Controls > Safety >
Parking Brake. Follow the onscreen instructions.
Use the touchscreen to manually release the parking
brake (which also shifts Model S into Neutral):
1. Touch Controls > Safety.
2. Press the brake pedal, then touch Parking Brake. If
© 2019-2026 Copyright www.tesms.org
