Tesla Model S: Knee Air bag - Driver's (Remove and Replace)
Warning: If the 12V power supply is disconnected, do not attempt to open any doors with door glass in closed position. Failure to follow this instruction could result in door glass shatter.
Note: Before disconnecting the 12V power supply, ensure that the driver's door window is fully open. Failure to follow this instruction could result in vehicle lockout.
Removal
- Disconnect 12V power.
- Rear wheel drive (RWD): Refer to procedure.
- Dual Motor: Refer to procedure.
- Remove the dash trim closing panel (refer to procedure).
- Remove the driver's side lower trim (refer to procedure).
- Disconnect the airbag harness connector.
Warning: To avoid personal injury, eye protection must be worn when performing this operation.
Warning: Store the air bag module with the deployment side facing up. This will prevent it from being propelled if accidentally deployed, which might cause injury.
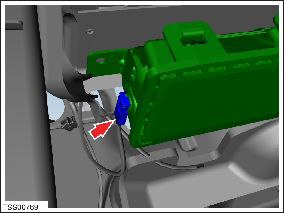
- Remove the nuts (x2) that secure the driver's knee airbag to the
dash rail (torque 10 Nm).
.png)
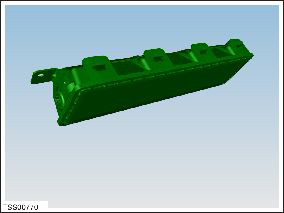
- Remove the airbag from the vehicle.
Installation procedure is the reverse of removal.
READ NEXT:
 Air bag - Front Passenger's (Remove and Replace)
Note: Removing the passenger's front airbag destroys the
instrument panel top pad.
Removal
Remove the top pad (refer to procedure)
Note: The top pad is
Knee Air Bag - Front Passenger's (Remove and Replace)
Warning: If the 12V power supply is disconnected, do
not attempt to open any doors with door glass in closed
position. Failure to follow this instruction could result in
door glass shat
Curtain Air bag - Driver's (Remove and Replace)
Warning: If the 12V power supply is disconnected, do
not attempt to open any doors with door glass in closed
position. Failure to follow this instruction could result in
door glass shat
SEE MORE:
Predicting Energy Usage
When navigating to a destination, Model S helps you
anticipate your charging needs by calculating the
amount of energy that remains when you reach your
destination. When navigating, the map displays this
calculation next to the battery icon on the turn-by-turn
direction list (see Navigating to
Map Display
Touch these icons to customize what the map displays:
Display/hide satellite imagery
(if equipped
with premium connectivity).
Display/hide traffic conditions
(if equipped
with premium connectivity). Green lines
indicate no traffic; orange lines indicate
light traffic; red lines indicate moder
