Tesla Model S: Switches - Steering Wheel (Remove and Replace)
Tesla Model S (2012-2026) Service Manual / Electrical / Switches - Steering Wheel (Remove and Replace)
Removal
- Remove the driver's air bag Air bag - Driver's (Remove and Replace).
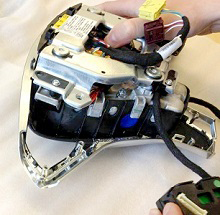
- Place the driver's air bag assembly on a soft clean surface with the backside of the bezel facing up.
- Unplug the harness connectors (x2) from the back of 1 of the
switches.
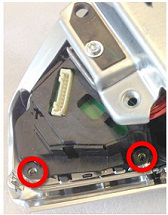
- Remove the fasteners (x2) that secure the switch to the air bag
assembly (torque 1.2 Nm).
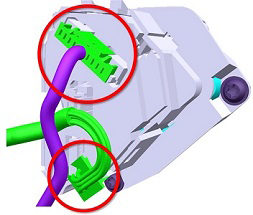
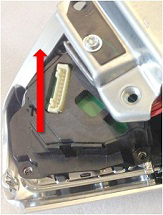
- Disengage the switch retaining clips by carefully pushing the
switch up through the back of the bezel.
Caution: Take care not to damage component(s).
- Remove the switch from the bezel.
- Repeat steps 3 through 6 on the other steering wheel switch.
Installation procedure is the reverse of removal.
READ NEXT:
 Front Reading (Dome) Lights (Remove and Replace)
Removal and Install
Use a trim stick to remove the front dome light bezels. Discard
the bezels.
Release the screw cover fr
Rear Reading (Dome) Lights (Remove and Replace)
Removal and Install
Use a trim stick to remove the rear dome light bezels. Discard
the bezels.
Note: If the vehicle does not have a panoramic
roof, skip to step 5.
Headlight - Adjust - North America
North America (SAE)
Prepare a work area for adjusting the headlights:
The area is darkened.
The ground is flat and level.
There is a wall with a white matte s
SEE MORE:
Accelerator Assembly (Remove and Replace)
Removal
Remove the driver's footwell cover:
Left-hand drive (LHD) vehicles: Refer to
procedure.
Right-hand drive (RHD) vehicles: Refer to
procedure.
Disconnect the harness connector from the top of the accelerator
pedal assembly.
Air Line - Air Suspension - Reservoir to Compressor (Remove and Replace)
Removal
Raise and support the vehicle (refer to procedure).
Depressure the air suspension system (refer to procedure).
Disconnect 12V power.
Rear wheel drive (RWD): Refer to
procedure.
Dual Motor: Refer to procedure.
Remove the underho
© 2019-2026 Copyright www.tesms.org
