Tesla Model S: Accelerator Assembly (Remove and Replace)
Tesla Model S (2012-2026) Service Manual / Instrument Panels and Pedals / Accelerator Assembly (Remove and Replace)
Removal
- Remove the driver's footwell cover:
- Left-hand drive (LHD) vehicles: Refer to procedure.
- Right-hand drive (RHD) vehicles: Refer to procedure.
- Disconnect the harness connector from the top of the accelerator
pedal assembly.
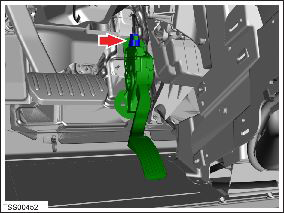
- Remove the nuts (x2) that secure the accelerator pedal assembly
to the mounting bracket (torque 9 Nm).
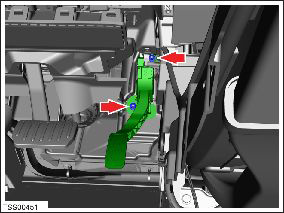
- Release the accelerator pedal assembly from the mounting bracket.
- Remove the accelerator pedal assembly from the vehicle.
Installation procedure is the reverse of removal.
READ NEXT:
 Glove Box (Remove and Replace)
Removal
Remove the RH lower instrument panel (refer to procedure)
Remove the lower glove box panel by releasing the trim clips
(x6).
Glove Box - Latch Release (Remove and Replace)
Removal
Remove glove box assembly (refer to procedure)
Remove screws (x3) securing latch release module to glove box
assembly.
Glove Box - Damper (Remove and Replace)
Removal
Remove glove box assembly (refer to procedure)
Depress clip and remove clevis pin securing damper module to
glove box assembly.
SEE MORE:
Latch - Hood - Secondary (RWD) (Remove and Replace)
Removal
Remove the front underhood apron (refer to procedure).
Remove the bolts (x2) that secure the secondary latch to the
crossmember (torque 10 Nm).
Caution: Care must be taken to avoid fasteners falling into
open cavity.
Body
Jack Mode Activation
Setting Procedure
Power up the touchscreen.
Note: Suspension height can only be
lowered when all doors are closed.
Touch Controls.
Touch Suspension.
Touch Jack.
Resetting Procedure
© 2019-2026 Copyright www.tesms.org
