Tesla Model S: Vent - Motorized - Front Fascia - LH (Remove and Replace)
Tesla Model S (2012-2026) Service Manual / Thermal Management / Vent - Motorized - Front Fascia - LH (Remove and Replace)
Removal
- If the vehicle is equipped with 1st generation front fascia applique, remove front fascia applique (refer to procedure) .
- Remove ankle catcher foam, if equipped.
.png)
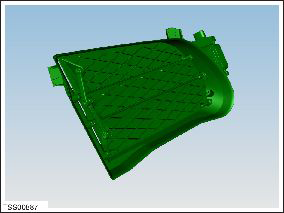
- Disconnect motorized vent harness connector.
.png)
- Remove screws (x3) securing vent to fog lamp and front fascia
assembly (torque 1 Nm).
.png)
- Release vent from front fascia static louvers (x2).
- Remove vent from front fascia assembly.
Note: Clean the affected areas before installation.
- Installation procedure is the reverse of removal, except for the following.
- If fog lamp is disturbed during vent removal check alignment after fascia installation. Via access hole in chin spoiler, adjust as necessary.
READ NEXT:
 Air bag - Driver's (Remove and Replace)
Warning: If the 12V power supply is disconnected, do
not attempt to open the front doors with door glass in closed
position. Failure to follow this instruction could result in
door glas
Knee Air bag - Driver's (Remove and Replace)
Warning: If the 12V power supply is disconnected, do
not attempt to open any doors with door glass in closed
position. Failure to follow this instruction could result in
door glass shat
SEE MORE:
Trim - Touch Screen Surround (Remove and Replace)
Removal
Remove the MCU/touch screen (refer to procedure).
Remove the screws (x6) that secure the touch screen surround
(torque 4 Nm).
Cut the cable tie that secures the Bluetooth antenna to the edge
clip on the bezel.
Remove the bezel from the MCU.
Remove the screws
Calibration - Panoramic Roof Assembly
Check
Close panoramic roof glass using touch screen.
Connect a laptop with Toolbox to the vehicle.
In Toolbox, select Views > Body/Security >
Panoramic Sunroof, then select "Calibrate". The sunroof opens and
closes.
When calibration is complete
© 2019-2026 Copyright www.tesms.org
