Tesla Model S: Wheel Arch Liner - Lower - Front - LH (Remove and Replace)
Tesla Model S (2012-2026) Service Manual / Exterior fittings / Wheel Arch Liner - Lower - Front - LH (Remove and Replace)
Warning: If the vehicle has air suspension, activate "Jack" mode on the touchscreen before raising and supporting the vehicle.
Removal
- Raise and support the vehicle (refer to procedure) Warning: Do not work on an incorrectly supported vehicle.
- Remove road wheel (refer to procedure)
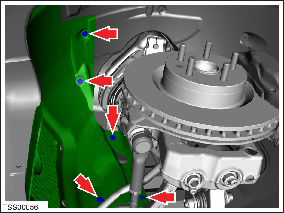
- Remove bolts (x2), plastic rivet (x1) securing wheel arch liner
to undershield and front diffuser panel (torque 3 Nm).
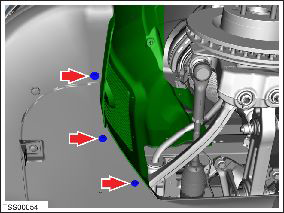
- Remove plastic rivets (x8) securing wheel arch liner to fascia,
front diffuser panel and upper wheel arch liner.
Note: Note installed position of components before removal.
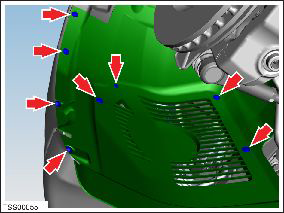
Note: Dual Motor vehicles do not have the 4 outboard rivets. The outboard section of the arch liner is secured by 3 trim clips.
- Remove plastic rivets (x4), nut (x1) securing lower wheel arch
liner to upper wheel arch liner and chassis (torque 3 Nm).
Note: Note installed position of components before removal.
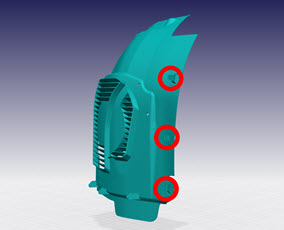
- Remove wheel arch liner.
Installation procedure is the reverse of removal.
READ NEXT:
 Panel - Aero Shield - Front (Remove and Replace)
Warning: If the vehicle has air suspension, activate "Jack"
mode on the touchscreen before raising and supporting the vehicle.
Removal
Raise and support the vehicle (refer to pro
Panel - Aero Shield - Mid (Remove and Replace)
Removal
Remove the LH diffuser tray rails (refer to procedure).
Repeat step 1 for the RH diffuser tray rails.
Remove the bolts (x9) that secure the mid aero shield panel to
the bo
Panel - Diffuser Tray - Rear (Remove and Replace)
Removal
Remove rear fascia assembly (refer to procedure)
Remove bolts (x6) and plastic rivets (x2) securing rear diffuser
to rear fascia and applique (torque 3 Nm).
SEE MORE:
DCDC Converter - 1st Generation (Remove and Replace)
Warning: Only technicians who have been trained in High
Voltage Awareness are permitted to perform this procedure. Proper
personal protective equipment (PPE) and insulating HV gloves with a
minimum rating of class 00 (500V) must be worn any time a high
voltage cable is handled. Refer
Left Scroll Button
Use the scroll button on the left side of the steering yoke
to adjust the position of the mirrors and steering yoke. It
also controls the wipers and media player.
When using media player, push the button to the left
to go back to the previous song or station or push it
to the right to skip
© 2019-2026 Copyright www.tesms.org
