Tesla Model S: Glove Box - Latch Release (Remove and Replace)
Tesla Model S (2012-2026) Service Manual / Instrument Panels and Pedals / Glove Box - Latch Release (Remove and Replace)
Removal
- Remove glove box assembly (refer to procedure)
- Remove screws (x3) securing latch release module to glove box
assembly.
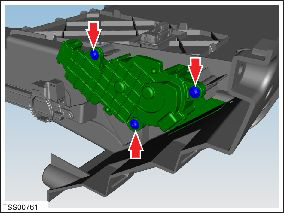
- Remove latch module from glove box.

Installation procedure is the reverse of removal.
READ NEXT:
 Glove Box - Damper (Remove and Replace)
Removal
Remove glove box assembly (refer to procedure)
Depress clip and remove clevis pin securing damper module to
glove box assembly.
IP Carrier (Remove and Replace)
Warning: If the 12V power supply is disconnected, do
not attempt to open any doors with door glass in closed position.
Failure to follow this instruction could result in door glass
shat
Cross Car Beam (Remove and Replace)
Removal
Remove the IP carrier (refer to procedure).
Remove the center console (refer to procedure).
Remove the nuts (x2) that secure the driver knee airbag. Retain
the washers (x2
SEE MORE:
Seal - Body - Side - Rear - Primary - LH (Remove and Replace)
Removal
Remove 'B' post upper trim (refer to procedure)
Release clip (x1) securing rear door seal to body.
Carefully release seal from rocker panel and work toward upper
section of seal.
Release remaining seal from brightwork.
Seasonal Tire Types
Understand Your Tire Type
The type of tires that your vehicle is originally equipped
with depends on vehicle model and market region. It is
important to understand the capabilities of your
vehicle's tires and whether they are suited for summer,
all-season, or winter driving. Check the informatio
© 2019-2026 Copyright www.tesms.org
