Tesla Model S: Fascia Assembly - Rear (Remove and Install)
Warning: If the vehicle has air suspension, activate "Jack" mode on the touchscreen before raising and supporting the vehicle.
Removal
- Position the vehicle in preparation for raising it, but keep the vehicle at ground level at this time.
- Peel back the bottom of the liftgate seal. Place a cover over
the seal area to avoid getting adhesive on clothing and interior
panels.
- Raise and support the vehicle (refer to procedure). Warning: Do not work on an incorrectly supported vehicle. Warning: To avoid serious injury, use appropriate equipment to carry out this operation.
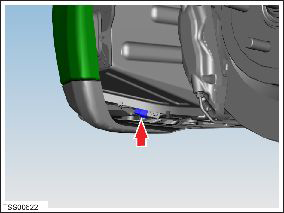
- Remove the fasteners (x4) that secure the diffuser tray rails to
the rear diffuser.
Note: The rear diffuser and fascia are removed as
an assembly.
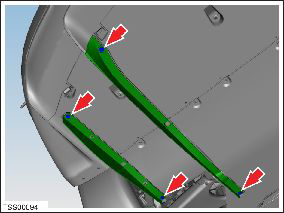
- Remove the bolts (x6) that secure the mid aeroshield to the rear
diffuser (torque 12 Nm).
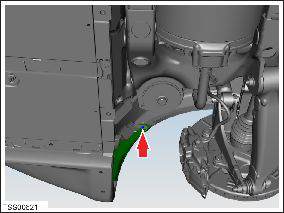
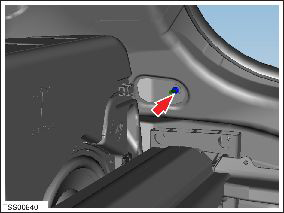
- Remove the nuts and push rivets that secure the rear wheel arch liners to the rear fascia (torque 3 Nm). Note: The wheel arch liners do not need to be removed from the vehicle.
- Pull back the rear edge of each wheel arch liner. Remove the
screws that secure the rear fascia to the LH and RH fenders (torque
1.5 Nm).
- Disconnect the rear parking assist harness connector, if
equipped.
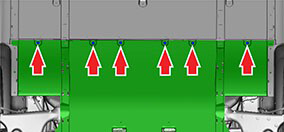
- Remove the nuts (x3) that secure the rear diffuser panel to the body (torque 3 Nm).
- Remove the bolts (x6) that secure the diffuser and applique to
the body (torque 4 Nm).

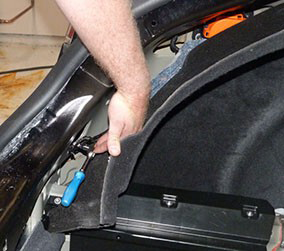
- Remove the LH and RH trunk side trim panels (refer to procedure) .
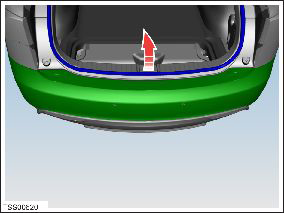
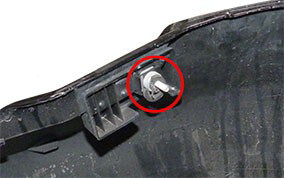
- Remove the nuts (x2) that secure the fascia to the body (torque
4 Nm).
Note: The nuts are hard to recover if they are dropped. Start loosening the nuts with a wrench, then perform the final loosening by hand.
- Pull the left and right edges of the fascia away from the body to release them.
- With assistance, release the rear fascia from the body. Remove
the fascia slowly and tilt the outer side down as it is removed to
avoid dropping any shims that are hanging on the studs.
Caution: Replace all nylon-insert locknuts.
Check the alignment of the rear fascia to the body and adjust as necessary.
READ NEXT:
 Fascia Assembly - Rear (Remove and Replace)
Removal
Remove the rear fascia for access (refer to procedure).
Remove the bolts (x4) and plastic rivets (x2) that secure the
diffuser tray to the rear fascia (torque 3 Nm).
Relea
Bumper Assembly - Rear (Remove and Replace)
Removal
Remove the rear fascia assembly for access (refer to procedure).
Remove the bolts (x8) that secure the bumper to the body (torque
52 Nm).
Diffuser Trim - Rear (Remove and Replace)
Removal
Remove rear diffuser (refer to procedure)
Remove plastic rivets (x2) and screw (x1) securing diffuser trim
to applique (torque 3 Nm).
SEE MORE:
Module - Air Suspension - ECU (RHD) (Remove and Replace)
Warning: If the 12V power supply is disconnected, do
not attempt to open any doors with door glass in closed position.
Failure to follow this instruction could result in door glass
shatter.
Note: Before disconnecting the 12V power supply,
ensure that the driver's door window
Replacing Cabin Air Filters
Model S has an air filter that prevents pollen, industrial
fallout, road dust, and other particles from entering the
cabin through the vents. Tesla recommends replacing
these filters every 2 years (every year in China). Cabin
filters can be purchased at the Tesla online store.
To replace the ca
