Tesla Model S: Horizontal Alignment
Tesla Model S (2012-2026) Service Manual / Electrical / Calibration - Front Radar Sensor / Horizontal Alignment
Note: Perform the "Vertical Alignment" procedure before performing the "Horizontal Alignment" procedure.
- Connect a laptop with Toolbox 2.0 or later to the vehicle.
- Perform the Radar Service Drive Alignment (SDA) procedure:
Note: Bring the hex driver in the vehicle during
the drive cycle.
Note: The following steps require an assistant.
- Shift the vehicle into Park.
- Select Panels > Driver Assist > Radar Service Drive Alignment.
- Click the Start/Play button.
- Follow the onscreen instructions. Warning: Perform the calibration procedure in a suitable location and comply with all local traffic safety laws.
- If Toolbox determines that the radar sensor needs to be
adjusted, adjust the horizontal set screw as necessary.
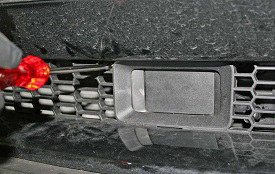
Note: If necessary, use the following images as a guide.
Clockwise turn Counterclockwise turn 

- If the radar sensor was adjusted in the previous step, perform steps 2 and 3 until Toolbox determines that the radar sensor does not need to be adjusted.
- Read DTCs:
- In Toolbox, select Panels > Alerts > DTCs.
- Ensure that the "Check all" box is checked.
- Click Read DTCs.
- Clear DTCs as necessary.
Receiver - Remote Keyless Entry (RKE) - Immobilizer (Remove and Replace)
RemovalRemove the Body Controller Module:
- If the vehicle is left hand drive (LHD), refer to procedure.
- If the vehicle is right hand drive (RHD), refer to procedure.
Installation procedure is the reverse of removal.
READ NEXT:
 Casing - Transmitter - Remote Keyless Entry (RKE)
Caution: Perform this procedure while using the proper anti-electrostatic
discharge equipment. Refer to TN-14-92-003, "Electrostatic Discharge
Tooling".
Removal
Remove the transm
Transmitter - Remote Keyless Entry (RKE) - Programming
Key LearnCaution: Before beginning this procedure, it is necessary to
have all keys present. Any keys that are not present will deactivate
after completing the procedure.
Sit in the d
LF Antenna - Bumper Carrier (Remove and Replace)
Removal
Remove the underhood storage unit (refer to procedure)
Disconnect the LF antenna harness connector.
Working thr
SEE MORE:
Trim - Sill Panel - LH (Remove and Replace)
Removal
Remove the LH middle 'A' pillar trim panel (refer to procedure).
Use a trim tool to release the 2nd clip from the rear.
Caution: To avoid damaging the sill panel, do not
attempt to pry it up from the rear before releasing this
clip.
Subframe Assembly - Rear (Remove and Install) -
Installation
Installation
Installation procedure is the reverse of removal,
except for the following:
Warning: Only use
cleaning agents and solvents in a well-ventilated area.
Caution: Replace all
nylon-insert locknuts.
Caution: Ensure that
© 2019-2026 Copyright www.tesms.org
