Tesla Model S: LF Antenna - Center - Heelboard (Remove and Replace)
Tesla Model S (2012-2026) Service Manual / Electrical / LF Antenna - Center - Heelboard (Remove and Replace)
Removal
- Depress button and fold 60% part of seat back forward.
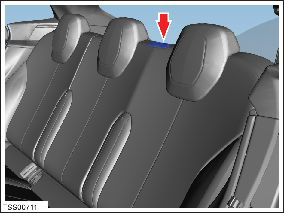
- Lift sufficient heelboard floor covering for access to LF antenna. Note: Components have been removed in this graphic to aid clarity.
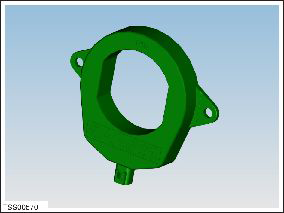
- Remove screws (x2) securing antenna to heelboard.
- Release antenna, depress clip and disconnect harness connector
from antenna.
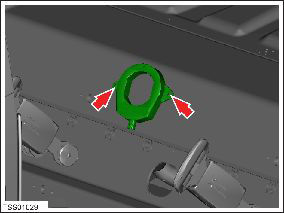
- Remove LF antenna.
Installation procedure is the reverse of removal.
READ NEXT:
 LF Antenna - Center - Rear (Remove and Replace)
Warning: If the vehicle has air suspension, activate "Jack"
mode on the touchscreen before raising and supporting the vehicle.
Removal
Raise and support the vehicle (refer to procedu
Switch - Hazard Warning (Remove and Replace)
Removal
Remove touch screen surround trim (refer to procedure)
Release hazard warning switch from substrate and disconnect
harness connector from switch.
Remove switch.
Power Socket 12V - Center Console - Rear (Remove and Replace)
Removal
Power driver's seat fully forward for access.
Release clips (x10) securing driver's side upper center console
trim to substrate.
SEE MORE:
Remove Front Drive Unit
Position the support jack on top of the front
crossmember and secure the 2 screws to the front crossmember.
The support jack mounts to the bolt holes on top of the front
crossmember that secured the coolant reservoir.
Fascia Assembly - Front (Remove and Replace)
Removal
Remove the front fascia (refer to procedure).
Remove the front fascia applique:
If the vehicle has the 1st generation front fascia applique,
refer to procedure.
If the vehicle has the 2nd generation front fascia applique,
refer to procedure.
© 2019-2026 Copyright www.tesms.org
