Tesla Model S: Panel - Door Trim - Front - LH (Remove and Replace)
Tesla Model S (2012-2026) Service Manual / Interior trim / Panel - Door Trim - Front - LH (Remove and Replace)
Removal
- Remove the driver's door switch pack (refer to procedure).
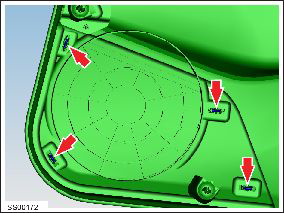
- Release the clips that secure the speaker cover to the door
trim.
Caution: Take care not to damage component(s).
- Carefully remove the speaker cover.
- Remove the foam dampers (x2) from the trim panel location pegs.
- Remove and discard the heart flex clips from the trim panel.
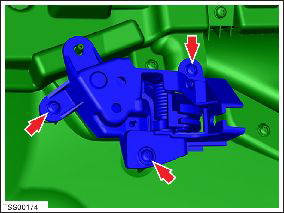
- Remove the screws that secure the door release lever to the door trim (torque 2 Nm).
- Remove the door release handle assembly from the door trim
panel.
- Release the clips and remove the puddle lamp holder.
- Release the clips and remove the safety lamp holder from the door trim.
- If equipped, disconnect the indirect lighting harness and
release the clips (x4) that secure the indirect lighting bar. Remove
the indirect lighting bar.
Installation procedure is the reverse of removal, except for the following:
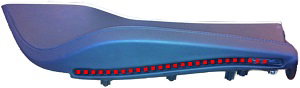
- If the old door trim panel was equipped with indirect lighting,
perform the following on the new door trim panel:
- Use a razor to cut along the bottom of the leather wrap on
the panel insert.
Note: Components have been removed in this graphic to aid clarity.
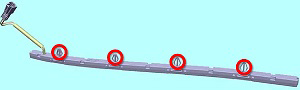
- Insert the indirect lighting harness through the opening.
- Insert the indirect lighting bar so that the clips (x4) are
fully secure.
Note: Components have been removed in this graphic to aid clarity.
- Connect the indirect lighting connector.
- Use a razor to cut along the bottom of the leather wrap on
the panel insert.
- Replace all heart flex clips that secure the trim panel.
Caution: Do not reuse the heart flex clips; they are one-time use only.
READ NEXT:
 Panel - Door Trim - LH - Rear (Remove and Install)
Removal
Position the vehicle so that there is full access to the door.
Open the door for access.
Release the screw cover from the door trim panel.
Cautio
Panel - Door Trim - LH - Rear (Remove and Replace)
Removal
Remove the rear window lift switch (refer to procedure).
Release the clips (x4) that secure the speaker cover to the door
trim.
Caution: Take care not to damage co
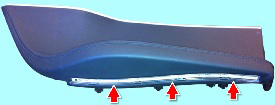
Trim - Sill Panel - LH (Remove and Replace)
Removal
Remove the LH middle 'A' pillar trim panel (refer to procedure).
Use a trim tool to release the 2nd clip from the rear.
Caution: To avoid damaging the sill panel,
SEE MORE:
Face Level Vent - Driver's - Inner (Remove and Replace)
Removal
Remove driver side lower dash trim (refer to procedure).
Remove the lower binnacle cover.
Remove the 2 screws beneath the lower binnacle cover that secure
the IP top pad to the IP carrier.
Antenna - GPS (Remove and Replace)
Removal
Remove liftgate glazing (refer to procedure)
Disconnect GPS harness connector.
Release GPS antenna from adhesive bond.
Release wiring harness from liftgate.
Note: Note installed pos
© 2019-2026 Copyright www.tesms.org
