Tesla Model S: Radiator (Remove and Replace)
Tesla Model S (2012-2026) Service Manual / Thermal Management / Radiator (Remove and Replace)
Removal
- Drain the cooling system (refer to procedure).
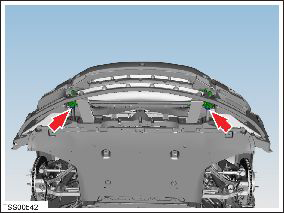
- Remove the front fascia assembly for access (refer to procedure).
- Release the clamps (x2) that secure the feed and return hoses to
the radiator. Release the hoses from the radiator.
Note: Place suitable absorbent material around the affected area to absorb any possible fluid spillage.
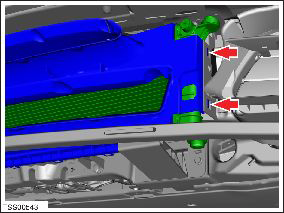
- Carefully release the clips (x2) that secure the front LH duct
to the rear duct. Repeat on the RH side.
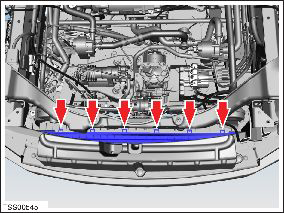
- Carefully release the clips (x6) that secure the radiator front
duct lower fixings to the rear duct.
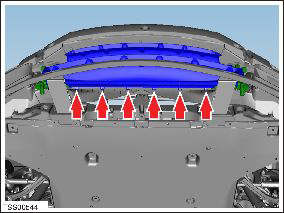
- Carefully release the clips (x6) that secure the radiator front
duct upper fixings to the rear duct.
- Remove the radiator front duct.
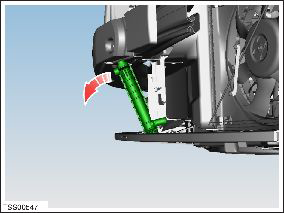
- Release the radiator from the upper mounting brackets (x2).
Caution: Be careful not to damage the radiator during this procedure.
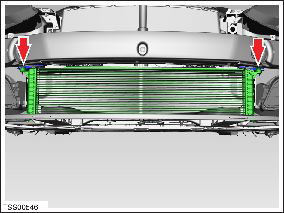
- Maneuver the top of the radiator forwards and lift up the bottom
to clear the ankle catcher.
Note: If necessary, remove the ankle catcher (refer to procedure).
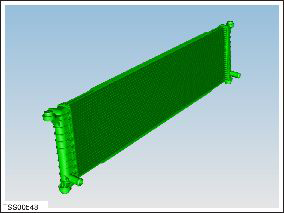
- Remove the radiator.
- Installation procedure is the reverse of removal, except for the following:
- Refill and bleed the cooling system (refer to procedure).
READ NEXT:
 Reservoir Assembly - Coolant (Remove and Replace)
Warning: If the 12V power supply is disconnected, do
not attempt to open any doors with door glass in closed position.
Failure to follow this instruction could result in door glass
shat
Reservoir Assembly - Coolant (Dual Motor) (Remove and Replace)
Warning: If the 12V power supply is disconnected, do
not attempt to open any doors with door glass in closed position.
Failure to follow this instruction could result in door glass
shat
Reservoir Cap - Coolant (Remove and Replace)
Removal
Remove the rear underhood apron (refer to procedure).
Remove the cap from the reservoir.
Installation
Ins
SEE MORE:
HV Rapid Mate Vehicle Side (Remove and Replace)
Removal
Remove the HV battery assembly(refer to procedure).
Lower the vehicle, but keep it in position to raise it in a
later step.
Remove the 2nd row seat cushion frame (refer to procedure) .
Remove the high voltage junction box (HVJB) cover:
1st Gen
Coat Hangers
Your Model S has a coat hanger on each side of the
vehicle above the rear window in the second row, next to
the reading light. Push the coat hanger to release it.
Push it again to retract it.
Active Road Noise Reduction
Model S is equipped with Active Road Noise Reduction
which reduces low-freq
© 2019-2026 Copyright www.tesms.org
