Tesla Model S: Rails - Diffuser Tray Rear - LH (Remove and Replace)
Tesla Model S (2012-2026) Service Manual / Exterior fittings / Rails - Diffuser Tray Rear - LH (Remove and Replace)
Warning: If the vehicle has air suspension, activate "Jack" mode on the touchscreen before raising and supporting the vehicle.
Removal
- Raise and support the vehicle (refer to procedure) Warning: Do not work on an incorrectly supported vehicle. Warning: To avoid personal injury, use appropriate equipment when performing this operation.
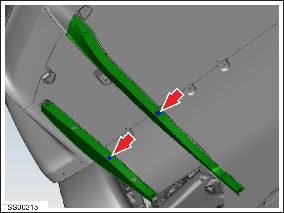
- Remove the bolts (x2) that secure the rear diffuser tray rails
(torque 4 Nm).
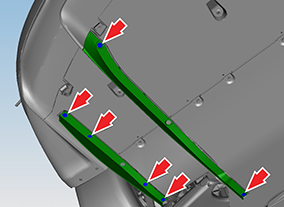
- Remove the plastic rivets (x2) and bolts (x4) that secure the
rear diffuser tray rails (torque 3 Nm).
- Remove the rear diffuser tray rails.
Installation procedure is the reverse of removal.
READ NEXT:
 Rear Lettering (Remove and Replace)
Special tool(s) required for this procedure:
Supplier
Part Number
Template color
Description
Applique - Liftgate (Remove and Replace)
Special tool required for this procedure:
Supplier
Part Number
Description
Tesla
1049517-0
Badge - Ludicrous Speed (Retrofit)
Special tool required for this procedure:
Supplier
Part Number
Description
SEE MORE:
Sensor - Pedestrian Protection (Remove and Replace)
Warning: If the 12V power supply is disconnected, do
not attempt to open any doors with door glass in closed
position. Failure to follow this instruction could result in
door glass shatter.
Note: Before disconnecting the 12V power supply,
ensure that the driver's door window
Antenna - GPS (Remove and Replace)
Removal
Remove liftgate glazing (refer to procedure)
Disconnect GPS harness connector.
Release GPS antenna from adhesive bond.
Release wiring harness from liftgate.
Note: Note installed pos
© 2019-2026 Copyright www.tesms.org
