Tesla Model S: Rear View Mirror - 1st Generation (Remove and Replace)
Tesla Model S (2012-2026) Service Manual / Interior trim / Rear View Mirror - 1st Generation (Remove and Replace)
Note: This procedure describes how to remove and replace the 1st generation rear view mirror. If the vehicle is equipped with a 2nd generation rear view mirror, refer to procedure 15050502 (refer to procedure).
Removal
- Cover the dash assembly to avoid damage. Caution: Make sure the touch screen is fully protected.
- Release the clips (x5) that secure the RH and LH mirror
finishers.
Caution: Take care not to damage component(s).
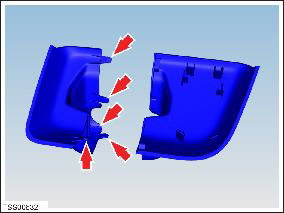
- Remove the LH and RH mirror finishers.
- Carefully turn the mirror assembly counter-clockwise and release it from the glazing mount.
- Release the clip and disconnect the mirror electrical harness
connection.
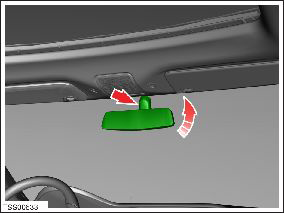
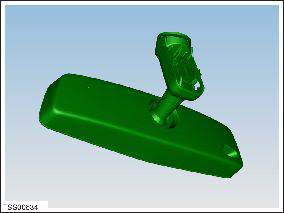
- Remove the mirror.
Installation procedure is the reverse of removal.
READ NEXT:
 Rear View Mirror - 2nd Generation (Remove and Replace)
Note: This procedure describes how to remove and replace
the 2nd generation rear view mirror. If the vehicle is equipped with
a 1st generation rear view mirror, refer to procedure 15050202 (re
Sun Visor - Driver's (Remove and Replace)
Removal
Use a trim stick or other non-marring pry tool to release the
visor mounting cover.
Caution: Take care not to damage component(s).
Assembly - Mirror - Sun Visor - LH (Remove and Replace)
Removal
Fold down the sun visor.
Starting at the top of the mirror assembly, use a trim tool to
pry the mirror assembly from the sun visor.
SEE MORE:
Windshield Assembly (Remove and Replace)
Note: Use Dow Betaseal Express or an equivalent fast-curing
glass adhesive to perform this procedure.
Special tool recommended for this procedure:
Supplier
Part Number
Description
Tesla
HV Junction Box - Reed Switch - 1st Generation (Remove and Replace)
Note: This procedure only applies to vehicles with the
1st generation High Voltage Junction Box.
Special tools required for this procedure:
Supplier
Part Number
Description
Bosch
© 2019-2026 Copyright www.tesms.org
