Tesla Model S: Seat Cushion - Lower - 2nd Row - Executive - LH (Remove and Replace)
Tesla Model S (2012-2026) Service Manual / Seats / Seat Cushion - Lower - 2nd Row - Executive - LH (Remove and Replace)
Removal
- Remove the 2nd row center console (refer to procedure).
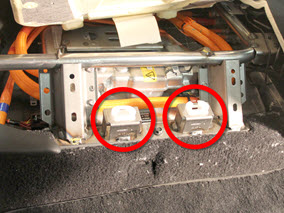
- Use both hands to firmly pull up on the front of the cushion to
release the 2 clips that secure it to the frame. Do not fully remove
the cushion at this time.
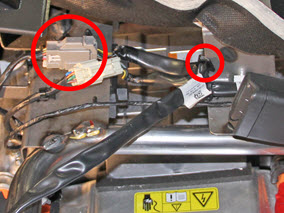
- Disconnect the seat heater harness and release the edge clip.
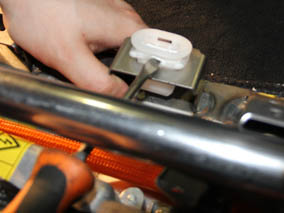
- Remove and discard the 2 grommets.
Note: After removing the cushion, the grommets are
either retained in the frame or on the seat clip.
Caution: Ensure that 2 new grommets are used during
reinstallation.
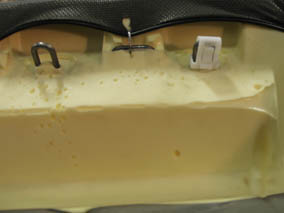
Replace the seat grommets.
READ NEXT:
 Back Rest Assembly - Seat - 2nd Row - LH (Remove and Install)
Removal
Remove rear seat base cushion for access (refer to procedure)
Remove the bolt that secures the seat belt to the 2nd row seat
base frame (torque 40 Nm).
Back Rest Assembly - Seat - 2nd Row - RH (Remove and Install)
Removal
Remove RH rear seat bolster (refer to procedure)
Use a pry tool to release the grommet that secures the RH 2nd
row backrest.
Back Rest Assembly - 2nd Row - Executive (Remove and Replace)
Removal
Remove the LH and RH lower seat cushions (refer to procedure).
On each side of the vehicle, remove the screw that secures the
closeout panel to the seat frame (to
SEE MORE:
Sensor - Impact - C Pillar (Remove and Replace)
Removal
Remove sill panel trim (refer to procedure)
Pull up lower portion of the 'C' post lower trim panel by
releasing the trim clips.
Caution: Take care not to damage component(s).
Caution: Replace any broken clips.
Vehicle Labeling
It is important to understand your vehicle's original tire
sizes and pressures, and the GVWR (Gross Vehicle
Weight Rating) and GAWR (Gross Axle Weight Rating).
This information can be found on two labels attached to
Model S.
Tire and Loading Information Label
Vehicle Certification Label
W
© 2019-2026 Copyright www.tesms.org
