Tesla Model S: Toe Link Assembly - Rear - LH (Remove and Replace)
Tesla Model S (2012-2026) Service Manual / Suspension / Toe Link Assembly - Rear - LH (Remove and Replace)
Warning: If the vehicle has air suspension, activate "Jack" mode on the touchscreen before raising and supporting the vehicle.
Removal
- Raise and support the vehicle (refer to procedure)
- Lower rear subframe for access (refer to procedure)
- Release clip securing electric parking brake harness to toe link.
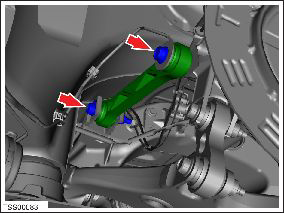
- Remove bolt securing toe link to knuckle (torque 130 Nm).
- Scribe witness lines from bolt cam to subframe, to aid assembly.
- Loosen nut and bolt securing toe link to subframe (torque 80 Nm).
- Remove bolt from subframe.
- Remove toe link.
- Installation procedure is the reverse of removal, except for the following: Note: Clean the affected areas before installation. Caution: Replace all nylon-insert locknuts. Caution: Only fully tighten suspension nuts and bolts when the vehicle is on a 4-post lift and the suspension is in the ride height position.
- Transfer vehicle to 4 post lift (refer to procedure)
- Perform a four wheel alignment check (refer to procedure)
READ NEXT:
 Drop Link - Sway Bar - Rear - LH (Remove and Replace)
Removal
Remove the road wheel (refer to procedure).
Remove the nut that secures the sway bar drop link to the lower
control arm (torque 70 Nm).
Caution: To p
Integral Link - Rear - LH (Remove and Replace)
Warning: If the vehicle has air suspension, activate "Jack"
mode on the touchscreen before raising and supporting the vehicle.
Removal
Remove road wheel (refer to procedure)
Air Spring Module - Front - LH (Remove and Replace)
Warning: If the vehicle has air suspension, activate "Jack"
mode on the touchscreen before raising and supporting the vehicle.
Removal
Raise and support the vehicle (refer to procedu
SEE MORE:
While Driving
Cold weather can increase energy consumption because
more power is required for driving, cabin and Battery
heating. Follow these suggestions to reduce energy
consumption:
Use seat heaters to keep warm. Seat heaters use less
energy than the cabin heater. Lowering the cabin
temperature and us
Maximum battery charge level reduced
OK to drive - Schedule service
Your vehicle has detected a condition internal to the high voltage battery
that is limiting the battery's performance.
As a result, maximum charge level and range are reduced. Service is required to
restore full performance.
Your vehicle is OK to drive and charge.
I
© 2019-2026 Copyright www.tesms.org
