Tesla Model S: Trim - 'A' Post - LH (Remove and Install)
Tesla Model S (2012-2026) Service Manual / Interior trim / Trim - 'A' Post - LH (Remove and Install)
Removal
- Remove the A-Pillar middle trim panels (refer to procedure)
- Release 'A' post trim retaining screw cover, lower edge first.
- Remove screw (x1) securing trim to 'A' post (torque 2 Nm).

- Carefully release clip (x1) securing trim to 'A' Post
- Clear location peg and lift to release lower locating lugs.
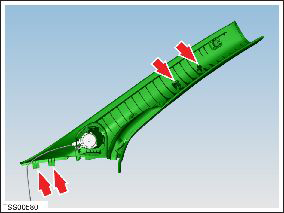
- Release trim from body.
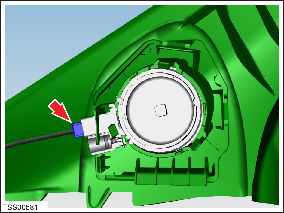
- Disconnect tweeter harness connector and remove 'A' post trim.
- Installation procedure is the reverse of removal, except for the following:
- Ensure both lower lugs are located and upper peg aligns to body before driving clip fully home.
READ NEXT:
 Trim - 'A' Post - LH (Remove and Replace)
Removal
Remove 'A' post trim (refer to procedure)
Release clips (x3) securing tweeter to ' A' post trim.
Remove tweeter
Trim - 'B' Post - Upper - LH (Remove and Install)
Removal
Remove the LH lower 'B' post trim (refer to procedure).
Carefully release the clips (x4) that secure the 'B' post upper
trim to the body by gently pulling the lower edge away
Trim - 'B' Post - Upper - LH (Remove and Replace)
Removal
Remove the LH lower 'B' post trim (refer to procedure).
Remove the plastic trim that covers the seat belt fixing on the
driver's seat.
SEE MORE:
Wiper Arms - Pair (Remove and Replace)
Special tools recommended for this procedure:
Supplier
Part Number
Description
Tesla
10558696-00-A
Wiper Arm Removal Tool
Removal
Open the hood.
Mark the i
Fascia Assembly - Front (Remove and Replace)
Removal
Remove the front fascia (refer to procedure).
Remove the front fascia applique:
If the vehicle has the 1st generation front fascia applique,
refer to procedure.
If the vehicle has the 2nd generation front fascia applique,
refer to procedure.
© 2019-2026 Copyright www.tesms.org
