Tesla Model S: Underhood Apron - Center - Rear (Remove and Replace)
Tesla Model S (2012-2026) Service Manual / Exterior fittings / Underhood Apron - Center - Rear (Remove and Replace)
Removal
- Remove the LH underhood apron (refer to procedure).
- Remove the RH underhood apron.
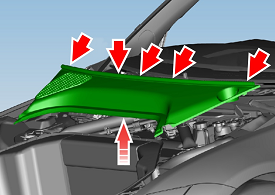
- Release the clips (x5) that secure the rear center underhood
apron to the plenum.

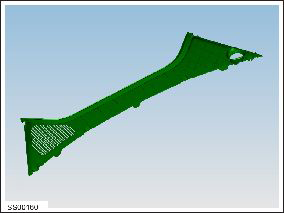
- Remove the rear center underhood apron.

Installation procedure is the reverse of removal.
READ NEXT:
 Underhood Apron - LH (Remove and Replace)
Removal
Open the hood.
Release the lugs (x3) that secure the LH underhood apron to the
inner fender.
Caution: Take care not to damage component(s).
 Motor - Seat Tilt - Driver's Seat (Remove and Replace)
Removal
Remove the driver's seat (refer to procedure).
Place the seat on a clean work surface.
Remove the screw that secures the inner side cover to the seat
(torque 1 Nm).
SEE MORE:
 Disconnect 12V Power (Dual Motor)
Warning: If the 12V power supply is disconnected, do
not attempt to open any doors with door glass in closed position.
Failure to follow this instruction could result in door glass
shatter.
Note: Before disconnecting the 12V power supply,
ensure that the driver's door window is
 Latch - Hood - Primary (RWD) (Remove and Replace)
Removal
Remove the hood latch cover (refer to procedure).
Remove the nuts (x2) that secure the latch assembly to the
crossmember (torque 16 Nm).
Release the latch assembly from the studs, then lower and
disconnect the harness connector.
Disconnect the hood release cable
© 2019-2026 Copyright www.tesms.org

