Tesla Model S: Actuator - Driver's Temperature (Remove and Replace)
Tesla Model S (2012-2026) Service Manual / Thermal Management / Actuator - Driver's Temperature (Remove and Replace)
Removal
- Remove IP carrier (refer to procedure)
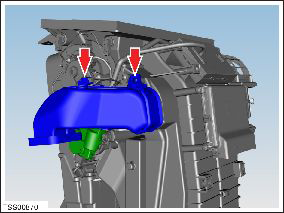
- Disconnect duct temperature sensor harness connector.
- Remove screw securing duct to HVAC assembly and position duct
aside (torque 1 Nm).
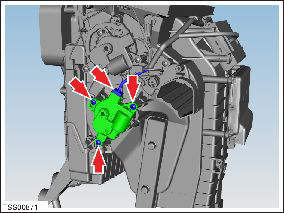
- Disconnect actuator harness connector.
- Remove screws (x3) securing driver's footwell actuator to HVAC assembly (torque 1 Nm).
- Remove driver temperature door flap actuator.
Caution: Take care not to damage component(s).
Installation procedure is the reverse of removal.
READ NEXT:
 Actuator - Mode (Remove and Replace)
Removal
Remove IP carrier (refer to procedure)
Disconnect duct temperature sensor harness connector.
Remove screw securing duct to HVAC assembly and position duct
aside (torque 1
Actuator - Front Passenger's Temperature (Remove and Replace)
Removal
Remove glove box assembly (refer to procedure)
Disconnect duct temperature sensor harness connector.
Remove screw securing duct to HVAC assembly, release from spigot
and p
Actuator - Defrost (Remove and Replace)
Removal
Remove glove box assembly (refer to procedure)
Disconnect actuator harness connector.
Remove screws (x3) securing defrost door actuator to HVAC
assembly (torque 1 Nm).
SEE MORE:
Bluetooth Compatibility
You can use your Bluetooth-capable
phone
hands-free in Model S provided your phone
is within operating range. Although
Bluetooth typically supports wireless
communication over distances of up to
approximately 30 feet (nine meters),
performance can vary based on the phone
you are using.
Befor
Sensor - Level - Windshield Washer Reservoir (Remove and Replace)
Removal
Remove the front LH upper wheel arch liner (refer to procedure).
Position a container to collect any spillage.
Disconnect the level sensor connector.
Remove the level sensor from the washer reservoir.
© 2019-2026 Copyright www.tesms.org
