Tesla Model S: Door Mirror Assembly - LH (Remove)
Tesla Model S (2012-2026) Service Manual / Exterior fittings / Door Mirror Assembly - LH (Remove and Replace) / Door Mirror Assembly - LH (Remove)
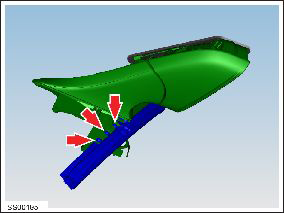
Removal
- Lower the front window glass.
- Remove the door trim panel (refer to procedure).
- Carefully release the clips (x2) that secure the front top end of the flap seal to the door.
- Release enough of the flap seal to access the mirror retaining
bolts.
Caution: Take care not to damage component(s).
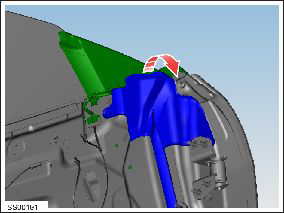
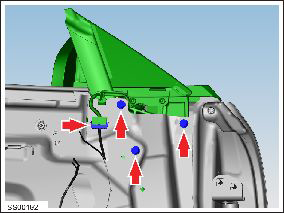
- Disconnect the mirror wiring harness connector.
- Release the mirror harness connector clip from the door.
- Remove the bolts (x3) that secure the door mirror assembly to
the door (torque 18 Nm).
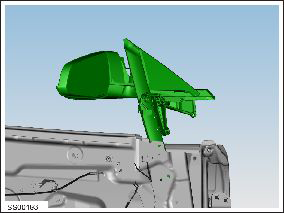
- Carefully remove the door mirror and quarter glass assembly.
Caution: Protect exterior paint work from possible damage during this procedure.
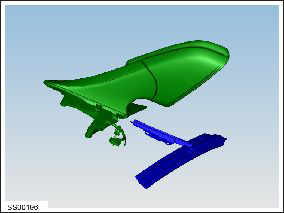
- Remove the bolts (x2) that secure the mirror to the quarter
glass retainer (torque 6 Nm).
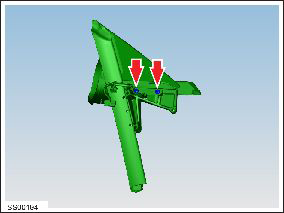
- Remove the bolts (x2 or x3) that secure the glass guide rail to
the mirror (torque 6 Nm).
- Remove the mirror assembly from the guide.
READ NEXT:
 Door Mirror Assembly - LH (Replace)
Installation
Installation procedure is the reverse of removal, except for the
following:
Inspect the mirror area of the door panel. Install 2 nylon shims
Glass - Door Mirror - LH (Remove and Replace)
Warning: To avoid personal injury, eye protection must be
worn when performing this operation.Warning: To avoid personal injury, wear cut-resistant
gloves when performing this operation.
'B' Post Trim Panel - LH (Remove and Replace)
Removal
Open both LH doors.
Remove clips (x2) securing 'B' post finisher to body.
Caution: Protect exterior paint surfaces during this
procedure.
SEE MORE:
Supercharger Usage Fees and Idle
Fees
When charging at a Tesla supercharger, information
about the charging session displays at the bottom of the
charging screen. This includes the location, the time that
charging started, and a cost estimate for the session.
When you stop supercharging, the estimated cost of the
session displays u
AC Refrigerant Leak Detection
Recover refrigerant from the vehicle (refer to procedure), see section "Recover
Refrigerant and Verify Charge").
Remove the underhood storage unit(refer to procedure).
Release the bolt that secures the HVAC compressor discharge line (torque
10 Nm).
© 2019-2026 Copyright www.tesms.org
