Tesla Model S: Frame - Seat Back - 2nd Row Seat - LH (Remove and Replace)
Tesla Model S (2012-2026) Service Manual / Seats / Frame - Seat Back - 2nd Row Seat - LH (Remove and Replace)
Removal
- Remove Rear LH seat back rest assembly and remove Pivot lock from outboard side of assembly (refer to procedure)
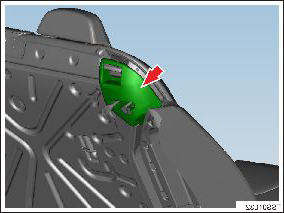
- Release and remove latch cover from seat back.

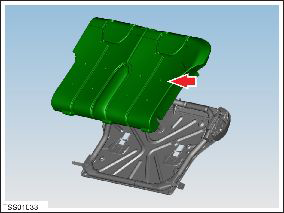
- Release cover from seat back frame.
- Remove cover and foam assembly from frame.

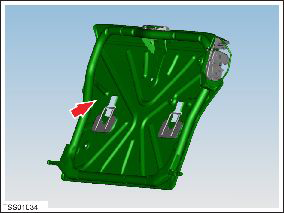
- Remove frame.

READ NEXT:
 Frame - Seat Back - 2nd Row Seat - RH (Remove and Replace)
Removal
Remove Rear RH seat back rest assembly and remove Pivot lock
from outboard side of assembly (refer to procedure)
Release and remove latch cover from seat back.
 Base Assembly - Front Passenger's Seat (Remove and Replace)
Removal
Remove the passenger's seat assembly (refer to procedure).
Place the seat on a clean work surface.
Remove the screws (x2) that secure the inner side cover to the
seat (tor
 Bolster - Side - Seat - 2nd Row - LH (Remove and Replace)
Removal
Fully open the LH rear door.
Release the LH rear seat back rest lock and push the rear seat
back rest flat for access.
Insert a wedge tool behind the bolster to provide ou
SEE MORE:
 To Use the Mobile App
To set up the Tesla mobile app to communicate with
your Model S:
1. Download the Tesla mobile app to your phone.
2. Log in to the Tesla mobile app by entering your Tesla
account credentials.
3. Enable mobile access to your Model S by touching
Controls > Safety > Mobile Access (see Control
 Door - Charge Port - Non-Motorized (Remove and Replace)
Removal
Remove the LH tail light assembly (refer to procedure).
Remove the screws (x3) that secure the charge port door to the
tail light assembly.
Remove the charge port door.
Installation
© 2019-2026 Copyright www.tesms.org

