Tesla Model S: Microphone - Bluetooth (Remove and Replace)
Tesla Model S (2012-2026) Service Manual / Infotainment / Microphone - Bluetooth (Remove and Replace)
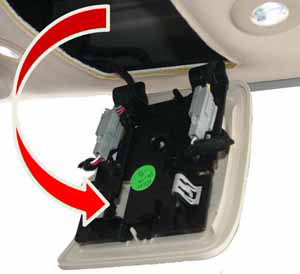
Removal
- Release the front of the exterior overhead console and pull
downward.
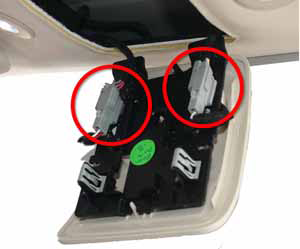
Caution: Do not damage the harness connections on the inside of the overhead console.
- Disconnect the 2 harness connections from the inside of the
overhead console.
- Remove the overhead console.
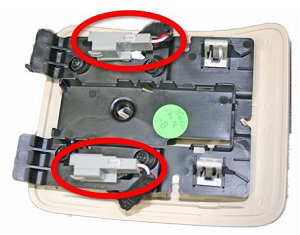
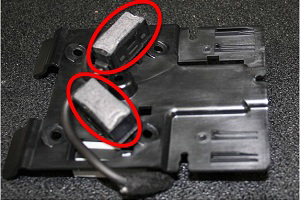
- Slide the connectors off of the microphone bracket.
- Release the screws (x4) that secure the microphone bracket to
the overhead console.
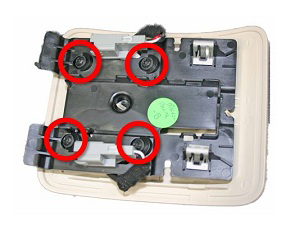
- Remove the affected microphone.
Installation procedure is the reverse of removal, except for the following:
Before securing the microphone bracket to the overhead console, ensure that the microphones are correctly positioned in the cutouts on the overhead console.

READ NEXT:
 Antenna - GPS (Remove and Replace)
Removal
Remove liftgate glazing (refer to procedure)
Disconnect GPS harness connector.
Release GPS antenna from adhesiv
Antenna - GSM - LH (Remove and Replace)
Note: The GSM antenna is a component within the door
mirror assembly. If the GSM antenna develops a fault, the whole
mirror assembly must be replaced.
Removal
Remove the door
SEE MORE:
Module - Air Suspension - ECU (Remove and Replace)
Warning: If the 12V power supply is disconnected, do
not attempt to open any doors with door glass in closed position.
Failure to follow this instruction could result in door glass
shatter.
Note: Before disconnecting the 12V power supply,
ensure that the driver's door window
Vent - Center Console (Remove and Replace)
Removal
Remove center console rear closing panel (refer to procedure)
Move front center arm rests forward.
Using a suitable tool depress clips (x4) securing rear vent to
center console.
Remove rear vent.
© 2019-2026 Copyright www.tesms.org
