Tesla Model S: Premium Boost Amplifier (Remove and Replace)
Tesla Model S (2012-2026) Service Manual / Infotainment / Premium Boost Amplifier (Remove and Replace)
Removal
- Release latch, disconnect amplifier harness connector and
position aside.
Caution: Take care not to damage component(s).
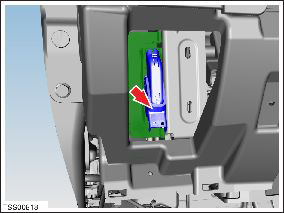
- Remove AM/FM tuner module (refer to procedure)
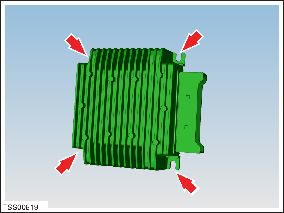
- Remove screws (x4) securing amplifier to bracket (torque 4 Nm).
- Remove amplifier from bracket.
Installation procedure is the reverse of removal.
READ NEXT:
 Tuner - AM - FM (Remove and Replace)
Note: This procedure applies to both base and premium
tuners (premium pictured).
Removal
Remove the driver side lower dash trim (refer to procedure).
Remove the driver si
Antenna Amplifier - AM/FM and RKE (Remove and Replace)
Removal
Remove the LH liftgate trim (refer to procedure).
Remove the screw that secures the amplifier to the liftgate.
Carefully disconnect the amplifier connector.
Release th
Antenna - RF Filter - RH (Remove and Replace)
Removal
Remove the RH liftgate trim (refer to procedure).
Remove the screw that secures the RF filter to the liftgate
(torque 1 Nm).
SEE MORE:
Ankle Catcher Assembly (Remove and Replace)
Removal
Remove the front fascia (refer to procedure).
Remove the bolts (x2) that secure the center of the ankle
catcher to the front ducting (torque 4 Nm).
Remove the bolts (x4) that secure the ankle catcher to the
Filter - Particulate (Remove and Replace)
Removal
Remove the rear center underhood apron (refer to procedure).
Release the retainers (x2) that secure the particulate filter
cover.
Note: Components have been removed in this graphic
to aid clarity.
© 2019-2026 Copyright www.tesms.org
