
Tesla Model S: Sensor - Ambient Air Temperature - Compressor (Remove and Replace)
Tesla Model S (2012-2026) Service Manual / Suspension / Sensor - Ambient Air Temperature - Compressor (Remove and Replace)
Removal
- Remove underhood storage unit for access (refer to procedure)
- Position hoses aside for access.
- Remove screw securing compressor ambient air temperature sensor (torque 2.5 Nm).
- Disconnect sensor harness lead.
- Rotate harness connector and release from bracket.
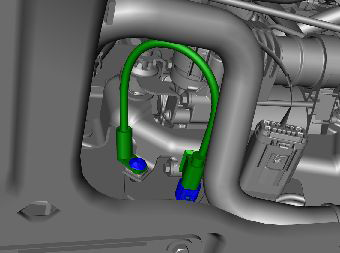
- Remove sensor.
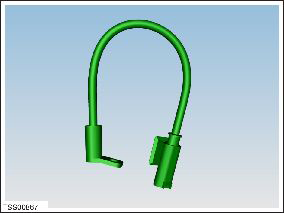
Installation procedure is the reverse of removal.
Note: Clean the affected areas before installation.
READ NEXT:
 Solenoid - Air Suspension (Remove and Replace)
Removal
Raise and support the vehicle (refer to procedure).
Depressurize the air suspension (refer to procedure).
Access the solenoid.
For vehicles manufactured be
Reservoir - Air Suspension (Remove and Replace)
Removal
Raise and support the vehicle (refer to procedure).
Depressurize air reservoir (refer to procedure).
Remove underhood storage unit (refer to procedure).
Disconnect 12V
Sensor - Ride Height - Front - LH (Remove and Replace)
Warning: If the vehicle has air suspension, activate "Jack"
mode on the touchscreen before raising and supporting the vehicle.
Removal
Position the vehicle on a lift, but do not
SEE MORE:
Buckle Assembly - 2nd Row - LH (Remove and Replace)
Warning: Prior to disconnection of 12 volt power supply,
ensure driver's door glass is in the fully open position. Failure to
follow this instruction could result in vehicle lockout.
Warning: If 12 volt power supply is disconnected, do not
attempt to open any doors with door glass in
3 Way Coolant Valve - Chiller Bypass (Remove and Replace)
Warning: If the vehicle has air suspension, activate "Jack"
mode on the touchscreen before raising and supporting the vehicle.
Warning: If the 12V power supply is disconnected, do
not attempt to open any doors with door glass in closed position.
Failure to follow this instruction c
© 2019-2026 Copyright www.tesms.org
