Tesla Model S: Skidplate - Rear (Remove and Replace)
Tesla Model S (2012-2026) Service Manual / Chassis / Skidplate - Rear (Remove and Replace)
Removal
- Remove rear diffuser tray (refer to procedure)
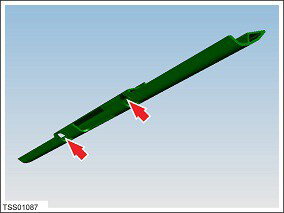
-
Remove screws (x2) securing rear skid plate to
subframe (torque 10 Nm).
Installation procedure is the reverse of removal.
READ NEXT:
 Skid Bar - Front Subframe (Remove and Replace)
Removal
Remove the front aero shield panel
(refer to procedure).
Remove and discard the inner bolts (x2) that
secure the skid bar to the front subframe (10 Nm).
Bash Plate - Front - Stamping (Remove and Replace)
Removal
Remove the front aero shield panel
(refer to procedure).
Remove the bash plate extrusion
(refer to procedure).
Remove and discard the bolts (x2), shoulder
Bash Plate - Front - Extrusion (Remove and Replace)
Removal
Raise and support the vehicle
(refer to procedure).
Remove and discard the bolts (x2) that secure
the bash plate extrusion to the front subframe (10 Nm).
SEE MORE:
Horn - 1st Generation (Remove and Replace)
Removal
Remove the front underhood apron (refer to procedure).
Remove the bolt that secures the horn to the bracket (torque 8
Nm).
Move the connector covers aside and disconnect the horn
connectors (x2).
Rem
Folding Rear Seats
Model S has a split rear seat that can fold forward.
Before folding, remove items from the seats and the rear
footwell. To allow the rear seats to fold completely flat,
you may need to move the front seats forward. To fold a
rear seat, push the corresponding button on the back of
the seat.
You
© 2019-2026 Copyright www.tesms.org
